Roast Beef & Cheddar Melt Sandwich: An Incredible Delight
There’s nothing quite like sinking your teeth into a Roast Beef & Cheddar Melt Sandwich: An Incredible Ultimate Recipe. Imagine the irresistible combination of tender, savory roast beef layered with gooey, melted cheddar cheese, all nestled between perfectly toasted bread and drizzled with a zesty sauce. It’s crispy, savory, fresh, and loaded with protein—each bite is a flavor explosion that satisfies even the heartiest of appetites. I created this sandwich during one of those busy weeks when meal prep was essential; it’s packed with about 35 grams of protein per serving, making it a perfect fuel for my family’s active lifestyle.
I still remember the first time I made this sandwich on a chilly Sunday afternoon. My teenagers had just returned from soccer practice, their cheeks flushed and stomachs growling. As I pulled the sandwiches from the skillet, my youngest exclaimed, “Wow, Mom! This looks amazing!” What sets my Roast Beef & Cheddar Melt apart is that zesty sauce—it’s a simple blend of horseradish and mustard that adds an unexpected kick. They devoured every last bite, and I couldn’t help but smile when my oldest asked if we could have it again next week. It’s moments like these that make cooking worthwhile!
Ingredients for the Roast Beef & Cheddar Melt Sandwich
Each ingredient in this dish plays an essential role in flavor and texture. Here’s what you’ll need:
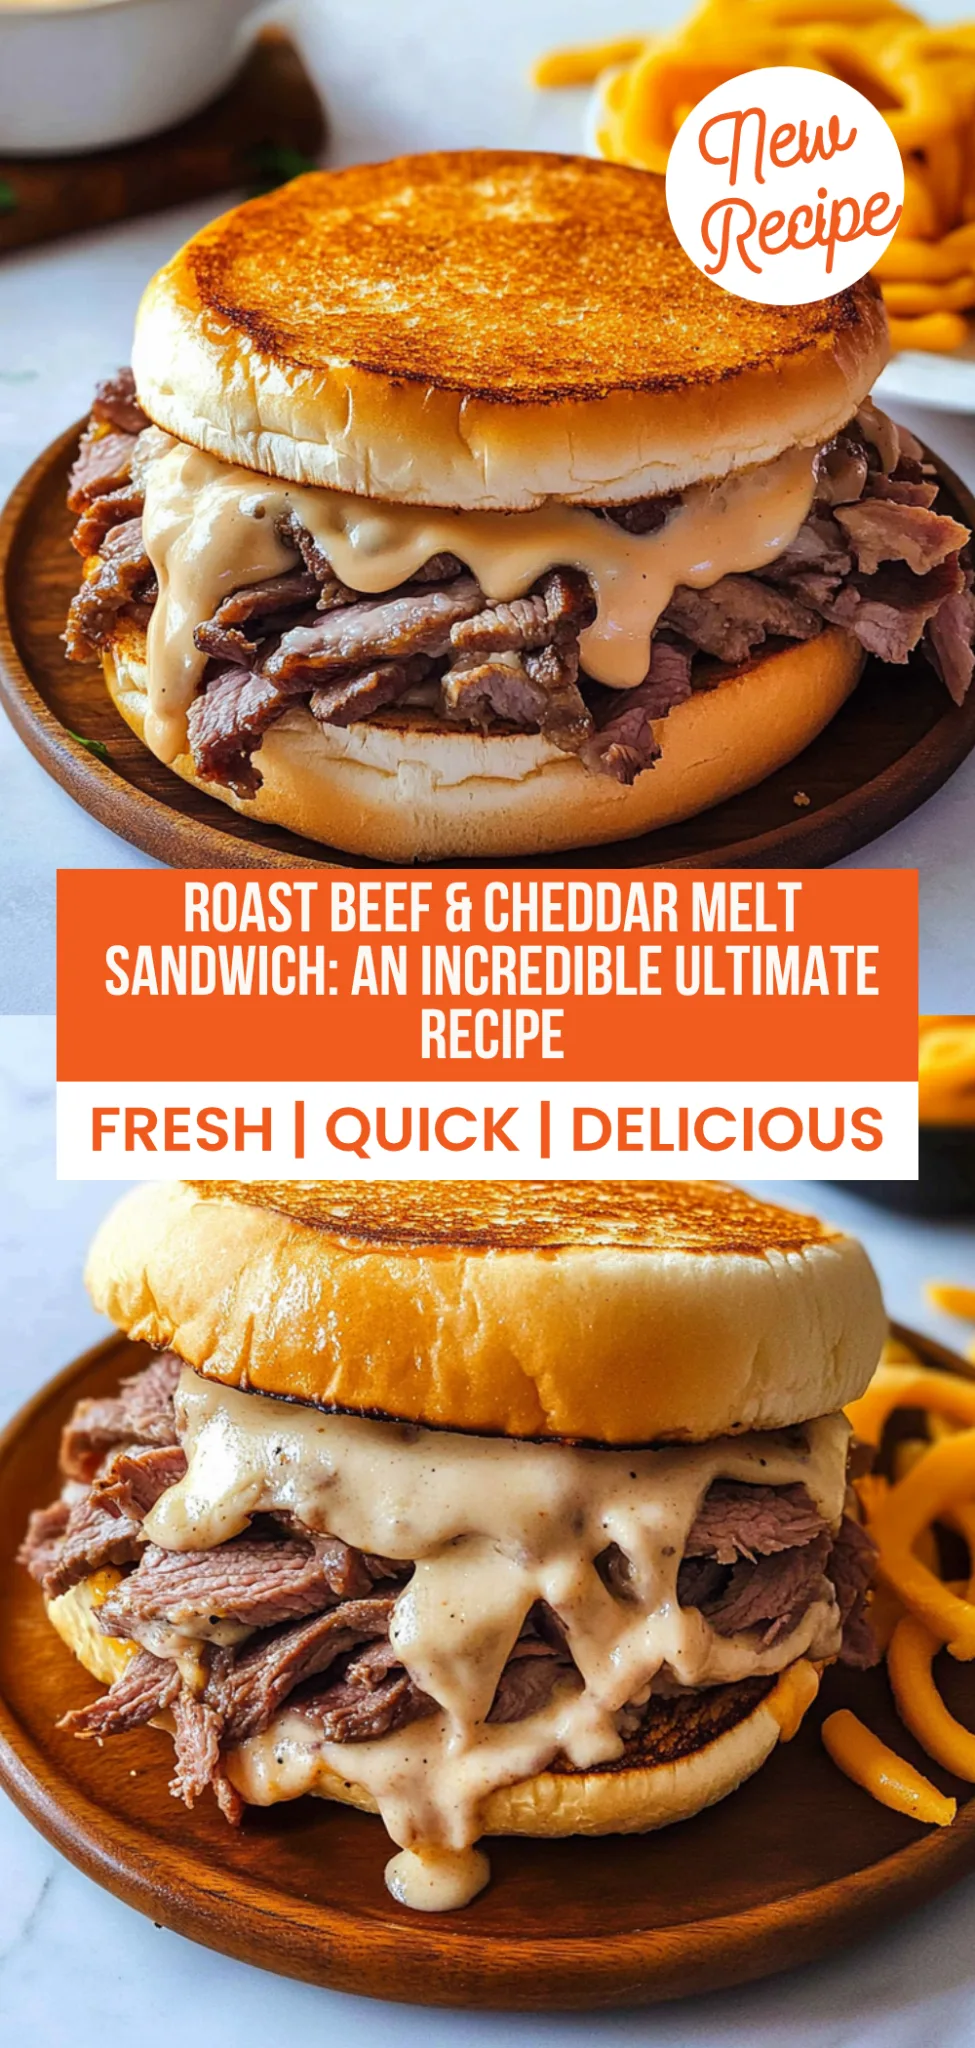
- 8 slices sourdough bread: Provides a sturdy base with a delightful crunch when toasted.
- 1 pound roast beef (thinly sliced): Offers rich, meaty flavor that makes the sandwich hearty and satisfying.
- 8 slices cheddar cheese (sharp or mild): Melts beautifully to create creamy layers of cheesy goodness.
- 4 tablespoons butter (softened): Ensures a golden, crispy crust while adding a touch of richness.
Step-by-Step Instructions
I recommend starting with the zesty sauce first, as it needs a moment to blend those flavors together while you prepare the rest of the sandwich.
Step 1: In a small bowl, mix together 1 tablespoon of Dijon mustard, 1 tablespoon of mayonnaise, and 1 teaspoon of Worcestershire sauce until well combined. This step is essential because it ensures the zesty sauce is flavorful and ready to elevate your sandwich. Take your time to stir it thoroughly; a well-mixed sauce will provide that perfect tangy kick that complements the roast beef and cheddar beautifully.
Step 2: Spread a thin layer of the zesty sauce on one side of each slice of sourdough bread. As you do this, make sure to cover the entire surface for maximum flavor in every bite. I usually use about a teaspoon per slice, but feel free to adjust based on how much zest you enjoy! This step is crucial because it creates a barrier that helps keep the bread from getting soggy when layered with juicy roast beef.
Step 3: Layer the roast beef evenly on four slices of bread, then top with two slices of cheddar cheese each. I recommend using thinly sliced roast beef for even layering; this allows for better melting and overall texture in your sandwich. The sharpness or mildness of cheddar can really change the flavor profile, so choose according to your preference! It’s important not to overstuff—keeping it balanced will ensure everything melts perfectly together.
Step 4: Top with the remaining bread slices, sauce side down. Gently press down on each sandwich to help them hold together during cooking. This step makes sure that all those delicious fillings are snugly packed inside, preventing any overflow while they cook. Plus, pressing helps encourage that perfect golden crust we’re aiming for!
Step 5: Heat a skillet over medium heat and add 1 tablespoon of butter. Allow it to melt completely before adding your sandwiches—this will create a nice crisp exterior. I use a cast-iron skillet for even heating and superior browning, but any heavy skillet will work well. Keep an eye on the temperature; if it’s too high, you risk burning the bread before the cheese has melted.
Step 6: Once melted, place two sandwiches in the skillet and cook for about 3-4 minutes until golden brown. You should see that beautiful crisp forming—don’t be tempted to flip them too early! I like to gently press down on them with a spatula to ensure even cooking across all surfaces. If you’re using thicker bread or cheese, keeping an eye on your time can help prevent any surprises.
Step 7: Flip the sandwiches, add another tablespoon of butter, and cook for an additional 3-4 minutes until the cheese is melted and the bread is golden. Be cautious when flipping; use a sturdy spatula and go slow to avoid any spillage! You’ll know they’re ready when both sides are evenly browned and you can see melty cheese oozing out.
Step 8: Repeat with the remaining sandwiches until complete. Depending on your pan size, you might need to cook these in batches—but trust me, it’s worth it for that fresh-off-the-stove goodness! I often keep finished sandwiches warm in a low oven while I finish cooking the rest.
Step 9: Slice the sandwiches in half and serve warm with your favorite side. This final touch allows for easier handling and showcasing those gooey layers inside! Enjoy every bite while it’s hot—you’ll be glad you did as all those flavors meld beautifully together.
What to Serve with Roast Beef & Cheddar Melt Sandwich
This sandwich is already incredibly filling and balanced, but these sides add extra variety and nutrition to round out your meal perfectly.
Garlic Roasted Broccoli: Tender broccoli florets tossed with olive oil, minced garlic, and a sprinkle of Parmesan cheese are roasted until crispy. This side not only adds a vibrant color contrast to the rich sandwich but also provides fiber and vitamins C and K. My kids love the crunchy texture, and it’s an easy way to sneak in some greens during dinner prep.
Sweet Potato Fries: Crispy sweet potato fries seasoned with paprika and sea salt bring a delightful sweetness that contrasts beautifully with the savory roast beef and cheddar. They offer complex carbohydrates for sustained energy along with vitamin A, making them a nutritious alternative to regular fries. I often batch-cook them for meal prep, so they’re ready to enjoy throughout the week alongside sandwiches or burgers.
Avocado Lime Dip: Creamy avocado blended with lime juice, garlic powder, and a touch of cilantro creates a refreshing dip that pairs well with the zesty sauce on the sandwich. This side adds healthy fats while enhancing the overall flavor profile through its creamy texture. I love serving this as a fun twist on guacamole; it’s always a hit at our family gatherings.
Classic Coleslaw: A crisp coleslaw made from shredded cabbage, carrots, and a tangy vinaigrette complements the richness of the roast beef melt perfectly. The crunchiness of the vegetables offers a satisfying texture contrast, while the vinegar dressing adds brightness to balance out the flavors. It’s my go-to side for outdoor barbecues, where it brings freshness to hearty meals.
Storage & Serving Tips
To store your Roast Beef & Cheddar Melt Sandwich for meal prep, place the sliced roast beef in an airtight container and keep it refrigerated for up to 4 days. The zesty sauce should be stored separately in a small container to maintain its freshness; this includes the Dijon mustard, mayonnaise, and Worcestershire sauce. For the bread, store the sourdough slices in a resealable bag or wrapped tightly in plastic wrap to prevent them from drying out. Keep the cheddar cheese slices in their original packaging or in a separate container to avoid moisture buildup.
When reheating, use a toaster oven or conventional oven to restore the sandwich’s crispiness by heating the sourdough bread at 350°F for about 5–7 minutes until warm and slightly toasted. The roast beef can be reheated quickly in the microwave for 90 seconds to 2 minutes; just make sure to stir it halfway through for even heating. Avoid microwaving the sourdough bread as it will become soft and unappetizing. For the cheddar cheese, place it on top of the warm roast beef during the last minute of reheating, allowing it to melt perfectly without losing its texture.
Pro tip: To batch cook this recipe for the week, consider doubling your ingredients on Sunday and portioning everything into containers for easy grab-and-go meals. Family members can assemble their own sandwiches as needed with individual containers of roasted beef, cheese, and zesty sauce alongside pre-sliced bread. For variety, swap out roast beef for thinly sliced turkey or chicken and try different cheeses like Swiss or pepper jack. To keep your cheddar slices at their best during meal prep storage, ensure they’re kept in a cool part of your fridge and sealed tightly to prevent drying out.
Conclusion
This Roast Beef & Cheddar Melt Sandwich: An Incredible Ultimate Recipe has become one of those meals I make almost every week because it’s not only packed with flavor and delivers a hearty 550 calories per serving, but it also hits the spot with that perfectly toasted sourdough bread. The richness of the melted cheddar cheese elevates this sandwich above typical deli offerings, making each bite a comforting experience. Give this one a try this week. I promise it’ll become a regular rotation meal in your house too.

Roast Beef & Cheddar Melt Sandwich
Ingredients
Method
- In a small bowl, mix together Dijon mustard, mayonnaise, and Worcestershire sauce until well combined.
- Spread a thin layer of the zesty sauce on one side of each slice of sourdough bread.
- Layer the roast beef evenly on four slices of bread, then top with two slices of cheddar cheese each.
- Top with the remaining bread slices, sauce side down.
- Heat a skillet over medium heat and add 1 tablespoon of butter.
- Once melted, place two sandwiches in the skillet and cook for about 3-4 minutes until golden brown.
- Flip the sandwiches, add another tablespoon of butter, and cook for an additional 3-4 minutes until the cheese is melted and the bread is golden.
- Repeat with the remaining sandwiches.
- Slice the sandwiches in half and serve warm with your favorite side.