Irresistible Gruyère & Thyme Italian Focaccia Recipe
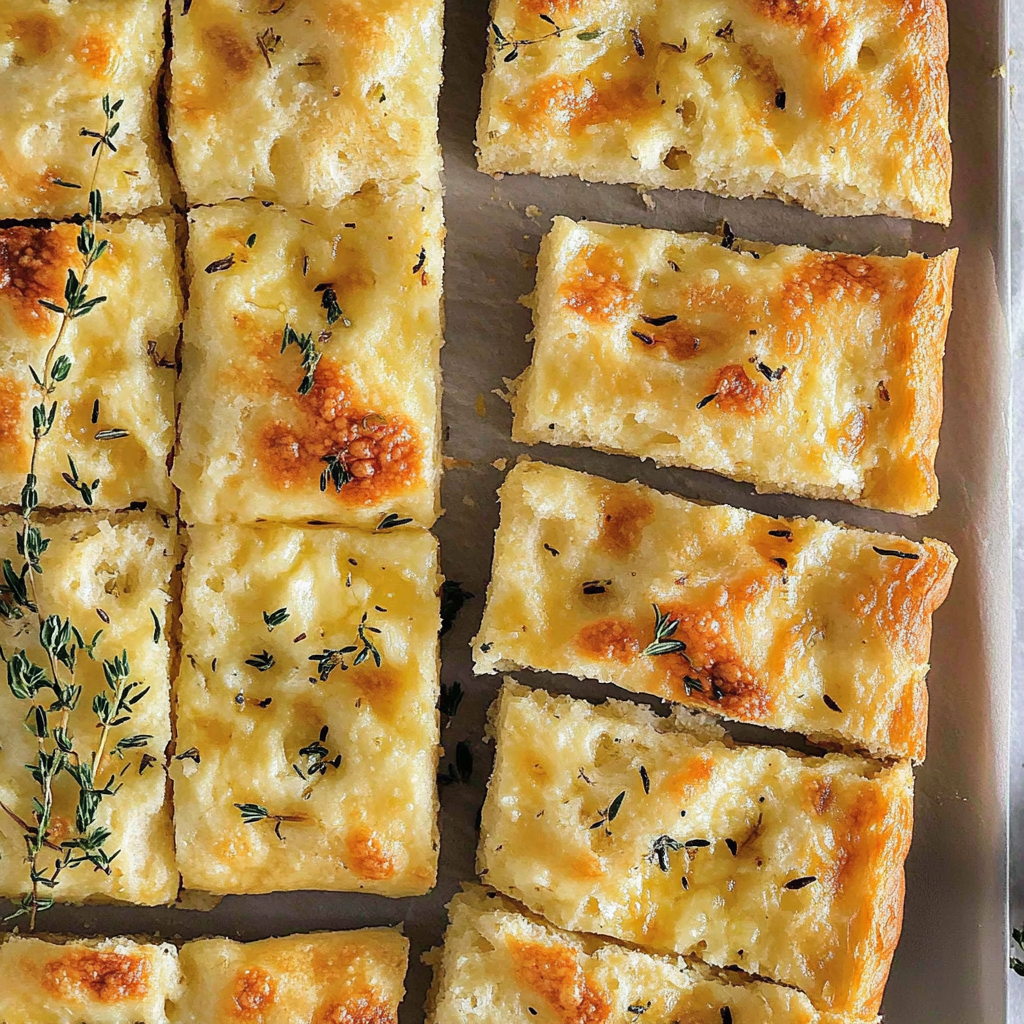
There’s something truly special about freshly baked bread, especially when it’s as delightful as Gruyère & Thyme Italian Focaccia. The warm aroma that fills your kitchen as it bakes is enough to make anyone feel at home. I love this recipe not just for its comforting flavors but also for its versatility—whether it’s a cozy dinner, a festive gathering, or a simple nibble with olive oil, this focaccia fits right in. The rich, nutty flavor of Gruyère cheese combined with the earthy notes of fresh thyme creates a perfect harmony that will have everyone reaching for seconds.
What makes this Gruyère & Thyme Italian Focaccia even better is how easy it is to prepare! You can impress your friends and family without spending all day in the kitchen. Trust me, once you serve this up, it will quickly become a favorite in your household too!
Why You’ll Love This Recipe
– Perfect for any occasion: Whether it’s a holiday feast or a casual family dinner, this focaccia adds a touch of warmth to your table.
– Easy to make: With just a few simple steps, you can create bakery-quality bread at home.
– Versatile flavors: The combination of Gruyère and thyme offers a unique taste that pairs beautifully with various dishes.
– Great for sharing: Slice it up and share with friends—it’s an instant crowd-pleaser!
– Freezes well: Make extra and store it for later; simply reheat and enjoy whenever you crave some delicious bread.

Ingredients You’ll Need
Gathering the right ingredients is key to making the perfect focaccia. Here’s what you’ll need for this scrumptious Gruyère & Thyme Italian Focaccia:
For the Dough
– 6 1/4 cups bread flour
– 2 teaspoons instant dry yeast
– 2 cups warm water (105°F – 115°F or 40°C – 46°C)
– 1 tablespoon granulated sugar
– 1/2 cup plus 2 tablespoons extra virgin olive oil
– 4 teaspoons fine sea salt
For Topping
– 1/4 cup extra virgin olive oil (plus more for greasing the sheet pan)
– 1/4 cup room temperature water
– 7 ounces gruyère cheese (sliced into small cubes)
– 2 tablespoons fresh thyme leaves
– 2 teaspoons Maldon sea salt flakes
Variations
One of the best things about focaccia is its flexibility! Feel free to mix things up based on what you have on hand or what you’re in the mood for:
– Swap out the cheese: Try using mozzarella or fontina if you’re looking for something different.
– Add some veggies: Toss in sliced olives or sun-dried tomatoes for an extra flavor kick.
– Experiment with herbs: Rosemary or oregano can be great substitutes if thyme is not available.
– Go sweet: Add some caramelized onions or roasted garlic to give it an unexpected twist.
How to Make Gruyère & Thyme Italian Focaccia
Step 1: Prepare the Dough
In a large mixing bowl, combine the warm water, sugar, and instant dry yeast. Let it sit for about five minutes until it becomes frothy. This step activates the yeast, ensuring your dough rises perfectly.
Step 2: Mix Ingredients
Add the bread flour and fine sea salt to the yeast mixture. Mix until combined. Then add in the half cup plus two tablespoons of olive oil. Knead the dough on a floured surface until smooth and elastic, which should take about ten minutes. Proper kneading helps develop gluten, giving your focaccia that lovely chewy texture.
Step 3: First Rise
Place the kneaded dough in an oiled bowl, cover it with plastic wrap or a damp cloth, and let it rise in a warm place until doubled in size—about one hour. This rising period is crucial as it allows air bubbles to form within the dough.
Step 4: Shape and Second Rise
Once risen, gently punch down the dough to release air. Transfer it onto an oiled sheet pan (12 x 18 inches) and stretch it out to fit into the corners. Cover again and let rise for another thirty minutes. This second rise will give your focaccia that wonderful fluffy texture.
Step 5: Prepare Toppings
Preheat your oven to 400°F (200°C). While waiting, mix room temperature water with more olive oil and pour over the risen dough. Use your fingers to dimple the surface of the dough deeply—it creates those signature pockets perfect for holding toppings! Scatter the cubed gruyère cheese evenly over top along with fresh thyme leaves and sprinkle Maldon sea salt flakes generously.
Step 6: Bake
Bake in your preheated oven until golden brown—approximately fifty minutes. Baking transforms your ingredients into delicious bread while letting those flavors meld beautifully together.
Step 7: Cool and Serve
Once baked, remove from oven and let cool slightly before slicing into pieces. Serve warm alongside some olive oil for dipping or enjoy plain—the choice is yours!
This Gruyère & Thyme Italian Focaccia recipe will surely become a staple in your kitchen! Enjoy every bite!
Pro Tips for Making Gruyère & Thyme Italian Focaccia
Making focaccia can be a delightful experience, and with the right tips, you’ll be able to elevate your bread-baking game. Here are some helpful pointers to ensure your Gruyère & Thyme Italian Focaccia turns out perfectly!
– Use high-quality flour: Opt for bread flour as it has a higher protein content, which helps develop the gluten structure for that perfect chewy texture.
– Don’t rush the rising: Allow your dough to rise until it has doubled in size. This usually takes about 1-2 hours but can vary depending on room temperature. Patience leads to better flavor and texture.
– Infuse flavor with olive oil: When you drizzle olive oil over the top before baking, it not only adds moisture but also enhances the flavor of the focaccia. Feel free to add more if desired!
– Experiment with toppings: While this recipe calls for gruyère and thyme, don’t hesitate to get creative! Add olives, sun-dried tomatoes, or even different herbs to personalize your focaccia.
– Keep an eye on baking time: Ovens can vary in temperature. Start checking your focaccia a few minutes before the recommended baking time to ensure it doesn’t overbake.
How to Serve Gruyère & Thyme Italian Focaccia
This delicious focaccia is not only a treat for the taste buds but also a feast for the eyes! Presenting it well can make all the difference at your table. Here are some ideas on how to serve this yummy dish:
Garnishes
– Fresh thyme sprigs: A sprinkle of fresh thyme leaves on top right before serving will enhance both the aroma and appearance.
– Drizzle of balsamic glaze: A light drizzle of balsamic glaze adds a sweet tang that pairs beautifully with the savory cheese.
Side Dishes
– Fresh salad: A simple arugula or mixed greens salad dressed with lemon vinaigrette complements the richness of the focaccia nicely.
– Roasted vegetables: Seasonal roasted veggies bring color and nutrition alongside this tasty bread.
– Soup: Pair it with a warm bowl of tomato basil soup for a cozy meal that feels like a hug in a bowl.
– Antipasto platter: Create an antipasto spread with marinated artichokes, olives, and fresh mozzarella for an Italian-inspired feast.

Make Ahead and Storage
Planning ahead makes life easier in the kitchen! You can prepare this focaccia in advance and store it without compromising its deliciousness.
Storing Leftovers
– Cool completely: Allow any leftover focaccia to cool completely at room temperature before storing it. This prevents condensation that could lead to sogginess.
– Wrap properly: Store in an airtight container or wrap tightly in plastic wrap; this keeps it fresh for up to 2 days at room temperature.
Freezing
– Slice before freezing: Cut into individual pieces before freezing so you can easily thaw just what you need later on.
– Use freezer bags: Place slices in resealable freezer bags, squeezing out as much air as possible. Label with the date; they can be frozen for up to 3 months.
Reheating
– Oven method: Preheat your oven to 350°F (175°C). Place slices on a baking sheet and heat for about 10 minutes until warmed through and crispy again.
– Microwave method: For quick reheating, place a slice on a microwave-safe plate covered with a damp paper towel. Heat for about 15 seconds; just be cautious not to overdo it as this can make the bread chewy.
FAQs
If you have questions about making your Gruyère & Thyme Italian Focaccia, you’re not alone! Here are some common inquiries that might help clarify things:
Can I use other cheeses instead of gruyère?
Absolutely! Feel free to swap gruyère for cheeses like mozzarella, provolone, or even feta. Each will impart its own unique flavor profile while still being deliciously complementary.
What if my dough doesn’t rise?
If your dough isn’t rising properly, check that your yeast is active. You can test this by mixing yeast with warm water and sugar; it should bubble up within minutes. If not, try using fresh yeast!
How long does this focaccia stay fresh?
When stored properly at room temperature, focaccia can stay fresh for up to 2 days. If refrigerated or frozen, follow storage instructions above for maximum freshness.
Final Thoughts
I hope you feel inspired to whip up this delightful Gruyère & Thyme Italian Focaccia! It’s perfect as an appetizer or side dish during any gathering—especially during those cozy fall evenings. Don’t hesitate to share your creations or tweak them with your favorite flavors; I’d love to hear how yours turns out! Happy baking!