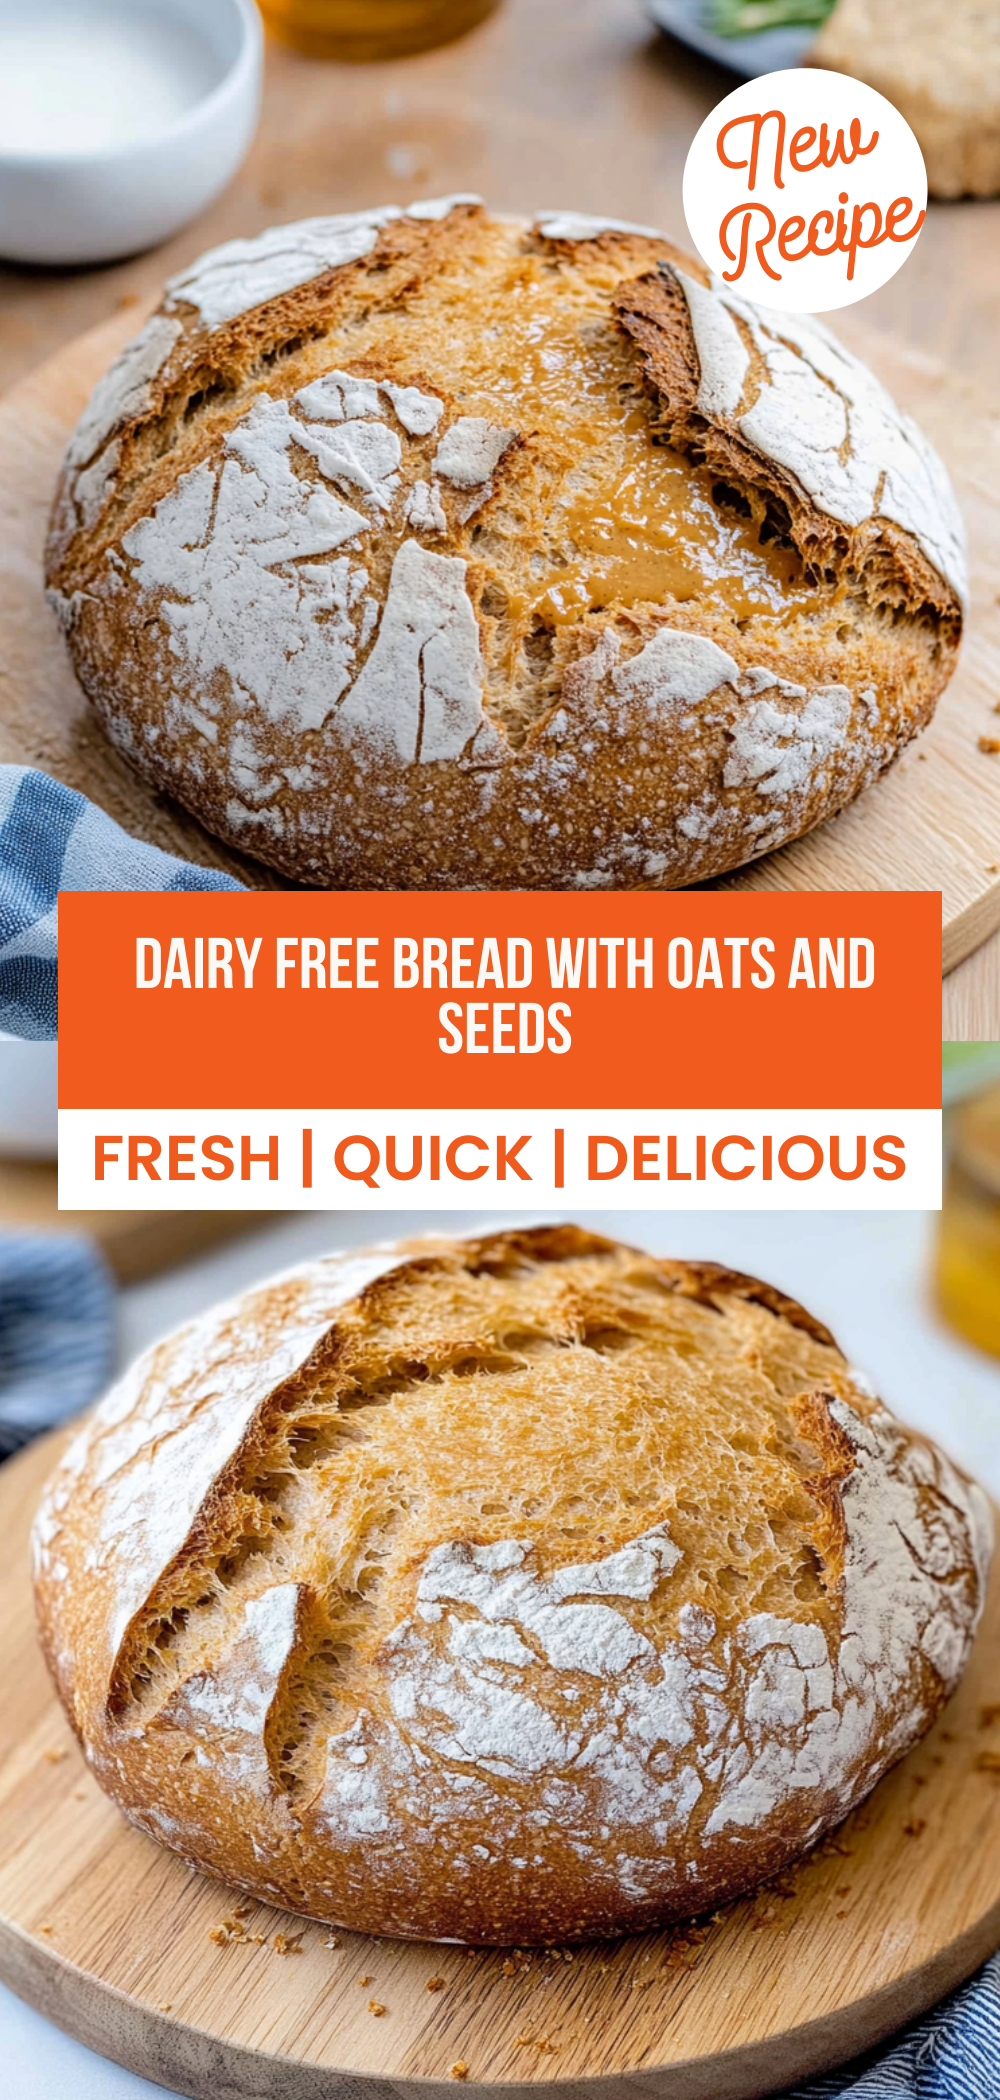
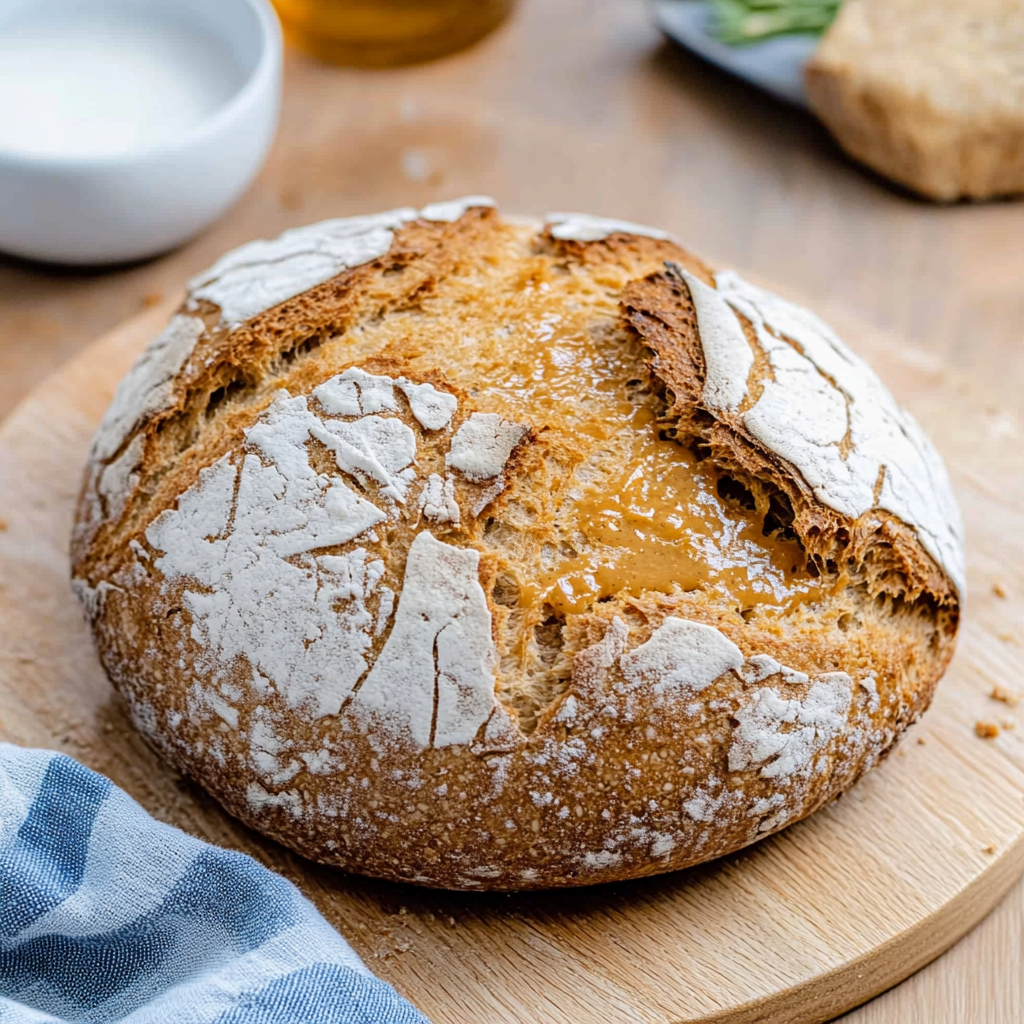
Perfect Dairy Free Bread: Easy & Delicious Recipe
The Secret to Perfect Dairy Free Bread Everyone Will Love
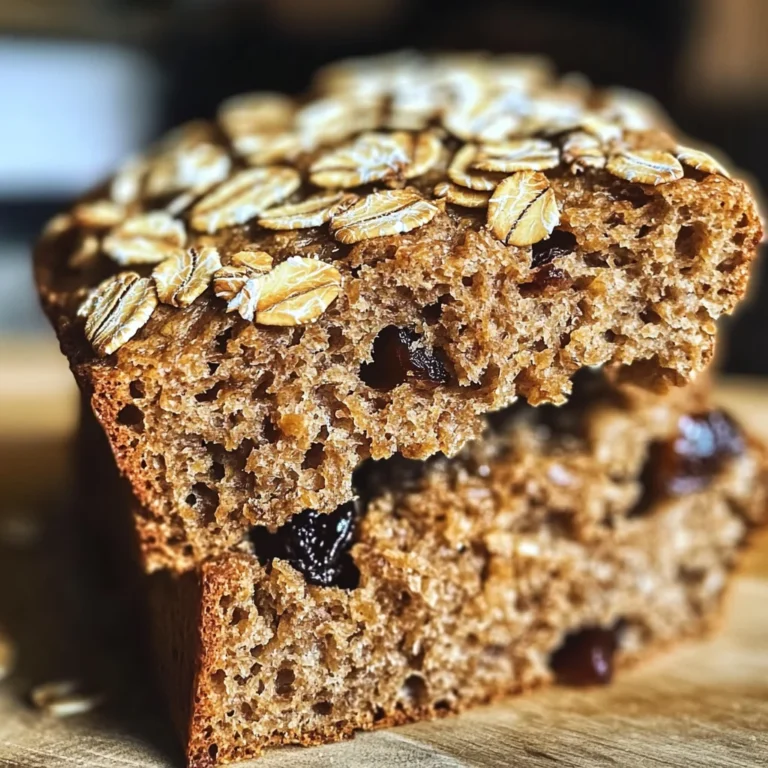
If you’re on the hunt for a delicious and easy-to-make bread recipe, look no further! This Dairy Free Bread is not only simple but also yields a crusty and fluffy loaf that will have your taste buds dancing. With no yeast required, this recipe is perfect for those who want fresh, homemade bread without the fuss. Imagine biting into a warm slice of this bread, topped with your favorite spread or used to make the ultimate sandwich.
Why You’ll Love This Dairy Free Bread
– Quick and easy preparation in just 10 minutes of prep time.
– No yeast means no waiting around for dough to rise.
– Perfectly crusty on the outside and fluffy on the inside.
– Versatile enough to pair with sweet or savory toppings.
– Ideal for breakfast or as a side for soups and salads.
Preparation Phase & Tools to Use
To whip up this delightful bread, you’ll need a few basic kitchen tools:
– Mixing bowls: For combining your dry and wet ingredients efficiently.
– Measuring cups and spoons: Ensure accuracy in your ingredient amounts.
– A sharp knife: For scoring the dough before baking to create that perfect crust.
– Baking tray: To hold your bread while it bakes to golden perfection.
– Parchment paper: Helps prevent sticking and makes cleanup a breeze.
Preparation Tips
For the best results, make sure to let your milk and vinegar sit until it curdles; this creates a wonderful texture in your bread. Don’t be afraid to keep the dough slightly sticky when kneading, as this will contribute to its fluffiness. Lastly, keep an eye on your bread as it bakes—every oven is different!
Ingredients for this Dairy Free Bread
– 1 cup milk of choice (I used oat milk)
– 2 tablespoons white vinegar (See notes)
– 2 cups all-purpose flour (Use gluten-free, if needed)
– 1/2 teaspoon baking soda
– 1/2 teaspoon salt
– 1 tablespoon sugar
Dairy Free Bread
Welcome to my kitchen! I’m excited to share with you my delightful dairy-free bread recipe that’s not only easy to make but also results in the most crusty, fluffy bread you’ve ever tasted. The best part? There’s no yeast needed! So, roll up your sleeves and let’s dive into this culinary adventure together.
Step-by-Step Instructions
Step 1: Preheat the Oven
Start by preheating your oven to 200C (400F). This is an essential step as it ensures that your bread will rise beautifully and develop a lovely golden crust. While the oven heats up, prepare your baking tray by lining it with parchment paper. This will prevent any sticky situations later on when it comes time to remove the bread.
Step 2: Make the Buttermilk Substitute
In a small bowl, combine your choice of milk (I used oat milk) with the white vinegar. Let this mixture sit for about 10 minutes until it curdles slightly. This homemade buttermilk substitute adds a wonderful tangy flavor to the bread and helps achieve that perfect texture.
Step 3: Mix the Dry Ingredients
In a large mixing bowl, add the all-purpose flour, baking soda, salt, and sugar. Whisk these ingredients together until they are well combined. This step is crucial as it evenly distributes the leavening agents and flavors throughout the flour.
Step 4: Combine Wet and Dry Ingredients
Once your buttermilk substitute is ready, it’s time to bring everything together! Using a 1/2 cup measuring cup, pour in half of your curdled milk mixture into the dry ingredients. Gently mix until just combined and then repeat with the remaining milk. The dough will be quite sticky, but that’s exactly what we want!
Step 5: Knead the Dough
Lightly flour a clean kitchen surface and sprinkle a tablespoon of flour on top of your dough. Transfer the dough onto this floured surface and knead gently for about 8-10 times until it forms a dome shape. Remember, don’t over-knead; we want to keep that lightness in our bread! Using a sharp knife, make two shallow cuts across the top in a cross shape.
Step 6: Bake the Bread
Carefully transfer your kneaded dough onto the prepared baking tray. Place it in the preheated oven and bake for about 20-25 minutes. Keep an eye on it after around 20 minutes; you’ll know it’s ready when it’s golden brown on top and sounds hollow when tapped on the bottom.
Step 7: Cool Before Slicing
Once baked to perfection, remove your bread from the oven and allow it to cool completely on the tray before slicing. This is an important step that helps maintain its structure and prevents any gooey textures inside.
Notes
One of the beautiful aspects of this dairy-free bread recipe is its versatility! You can easily swap out some ingredients based on what you have at home or dietary preferences. For instance, if you need a gluten-free option, just use gluten-free all-purpose flour instead of regular flour. You can also enhance flavors by adding herbs like rosemary or thyme or even incorporating seeds such as sunflower or pumpkin seeds for added crunch and nutrition.
Feel free to experiment with different milks too—almond milk or soy milk work great as alternatives! Adding spices like garlic powder or onion powder can elevate this simple loaf into something extraordinary.
Watch Out for These Mistakes While Cooking
– Using cold ingredients can affect how well your bread rises.
– Overmixing can lead to dense bread; mix just until combined.
– Skipping the cooling time might result in gummy slices.
– Not checking for doneness could leave you with undercooked centers.
Storage Instructions
To store any leftovers, place them in an airtight container at room temperature for up to three days. If you’d like to keep it longer, feel free to slice and freeze individual pieces! When you’re ready to enjoy again, simply toast them directly from frozen or allow them to thaw in the fridge overnight.
Estimated Nutrition
– Calories: 125 kcal
– Protein: 3 g
– Fat: 1 g
– Carbs: 25 g
– Sodium: 255 mg
– Fiber: 1 g
– Sugar: 2 g
Frequently Asked Questions
Can I use other types of flour?
Absolutely! You can experiment with whole wheat flour or spelt flour if you prefer those options. Just keep in mind that using whole grain flours may alter the texture slightly.
What should I serve this bread with?
This dairy-free bread pairs wonderfully with spreads like almond butter or avocado mash. You can also serve it alongside soups or salads for a wholesome meal!
Can I add other ingredients?
Definitely! Feel free to incorporate nuts, seeds, or dried fruits into your dough for added flavor and texture—just adjust baking time if necessary based on added moisture content.
How do I know when my bread is done?
Your bread is done when it’s golden brown on top and sounds hollow when tapped on its base. If you’re unsure, using a toothpick inserted in the center should come out clean!
Conclusion
I hope you’re feeling inspired to try out this delicious dairy-free bread recipe! It’s simple enough for beginners yet satisfying enough for experienced bakers alike. Don’t forget to share your thoughts once you’ve made it—I’d love to hear how it turned out for you! Happy baking!
Dairy Free Bread
Ingredients
Method
- Preheat your oven to 200C (400F) and prepare your baking tray by lining it with parchment paper.
- Combine your choice of milk with the white vinegar and let it sit for about 10 minutes until it curdles slightly.
- In a large mixing bowl, whisk together the all-purpose flour, baking soda, salt, and sugar until well combined.
- Pour half of your curdled milk mixture into the dry ingredients and mix until just combined. Repeat with the remaining milk.
- Lightly flour a clean surface, transfer the dough, and knead gently for about 8-10 times. Make two shallow cuts across the top.
- Transfer the kneaded dough onto the prepared baking tray and bake for about 20-25 minutes until golden brown.
- Allow the bread to cool completely on the tray before slicing.