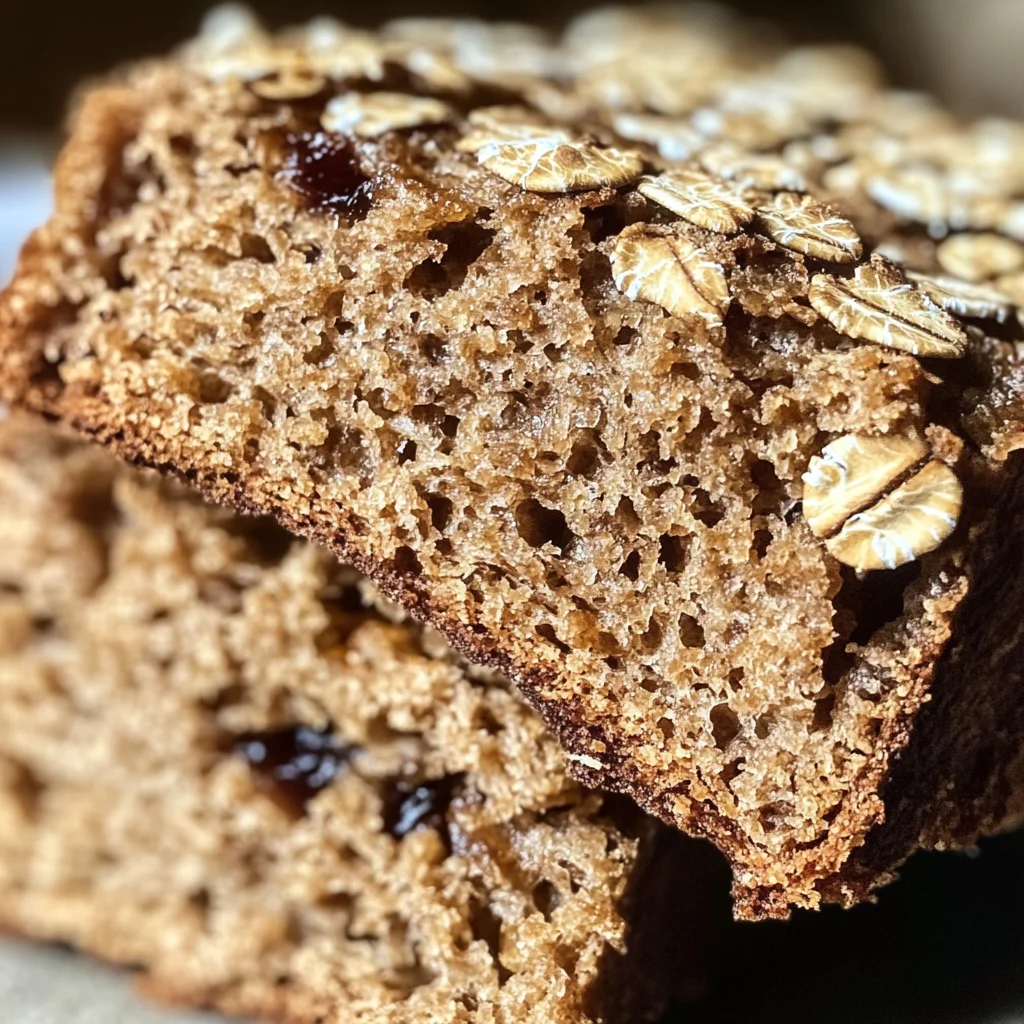
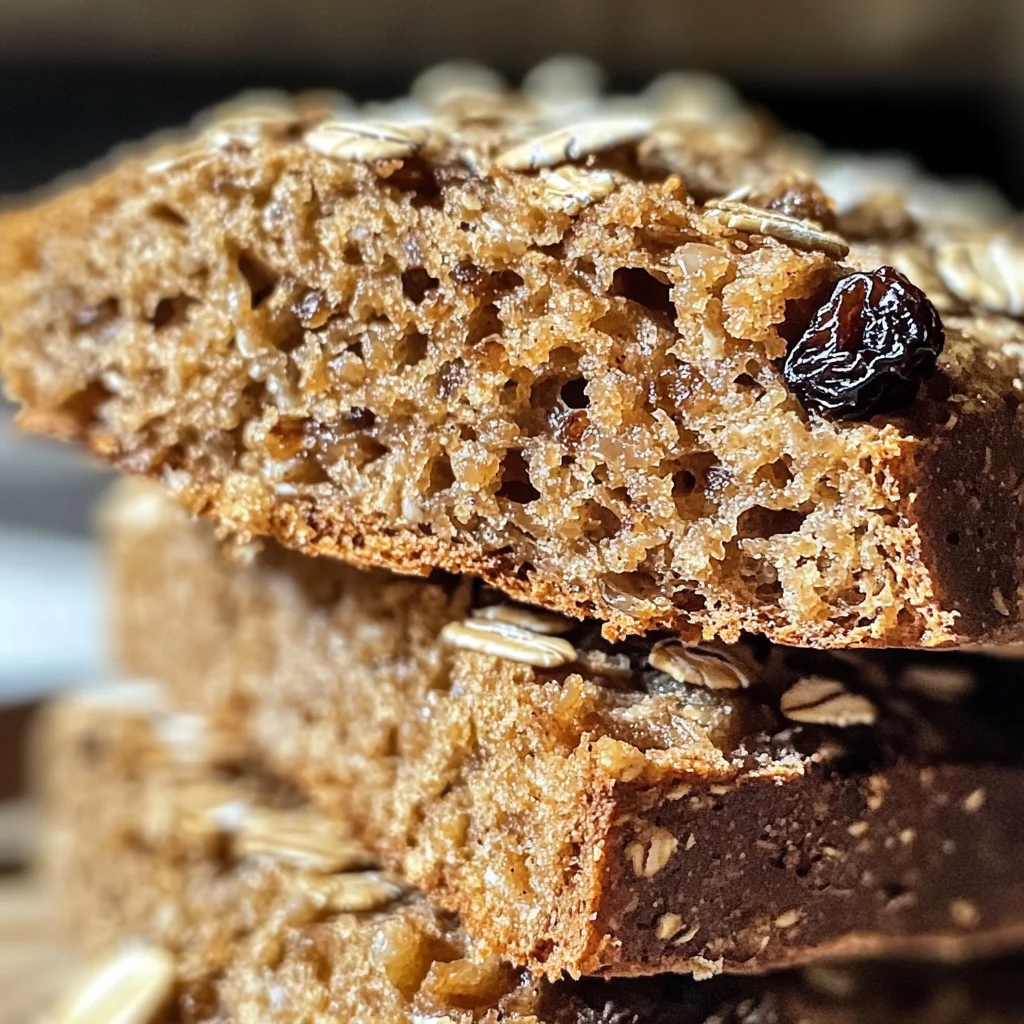
Homemade Irish Brown Bread: Quick, Rustic Comfort Awaits
If you’re looking for a warm, hearty bread that fills your home with the comforting aroma of baking, then this Homemade Irish Brown Bread: Quick, Rustic Comfort Awaits is just what you need! This recipe is a family favorite of mine, passed down through generations. It’s perfect for busy weeknights when you want something quick and satisfying or for cozy weekends spent with loved ones around the table.
What I love most about this bread is its simplicity. You can whip it up in no time and serve it alongside soups, salads, or slathered with butter and jam. Plus, it’s an excellent way to use pantry staples while bringing a taste of Ireland right into your kitchen!
Why You’ll Love This Recipe
- Easy to Make: This recipe comes together quickly with minimal effort, making it perfect for both novice and experienced bakers.
- Family-Friendly: Kids love the chewy raisins or currants, and everyone enjoys the nutty flavor of whole wheat flour.
- Make-Ahead Convenience: Bake a loaf ahead of time to have fresh bread ready for breakfast or snacks throughout the week.
- Versatile Pairing Options: Serve with soup, salad, or as part of a charcuterie board—this bread fits right in!
- Heartwarming Aroma: The delightful smell of baking bread will make your kitchen feel like home.
Ingredients You’ll Need
Let’s gather some simple, wholesome ingredients that will come together to create this delightful brown bread. You probably have most of these in your pantry already!
For the Bread
- 2 cups Whole Wheat Flour (A hearty, nutty base; replace with all-purpose flour for a lighter texture.)
- 1 cup All-Purpose Flour (Lightens the dense consistency; use extra whole wheat flour for more fiber.)
- 1 cup Old Fashioned Rolled Oats (Provides texture; quick oats can work but will change final result.)
- 1 cup Buttermilk (Adds tang and acts as a leavening agent; substitute with plant-based milk and lemon juice.)
- 1 teaspoon Baking Soda (Key leavening agent vital for bread rise.)
- 1 teaspoon Salt (Enhances flavors; adjust to suit taste.)
- 2 tablespoons Honey or Maple Syrup (For a touch of sweetness.)
- 1 tablespoon Caraway Seeds (Adds flavor that pairs well with rustic bread.)
- 1 cup Raisins or Currants (For chewiness and sweetness.)
Variations
This recipe is wonderfully flexible! Feel free to get creative and make it your own. Here are some fun variations you might enjoy:
- Add Nuts: Toss in some chopped walnuts or pecans for added crunch and richness.
- Try Different Sweeteners: Swap honey for agave syrup or use brown sugar for a deeper flavor.
- Herb Infusion: Mix in fresh herbs like rosemary or thyme to give your bread an aromatic twist.
- Fruit Swap: Replace raisins or currants with dried cranberries or apricots for a fruity surprise.
How to Make Homemade Irish Brown Bread: Quick, Rustic Comfort Awaits
Step 1: Preheat Your Oven
Start by preheating your oven to 425°F (220°C). This step is important because it ensures that your bread bakes evenly and develops that lovely crust we all crave!
Step 2: Combine Dry Ingredients
In a large mixing bowl, whisk together the whole wheat flour, all-purpose flour, rolled oats, baking soda, salt, caraway seeds, and raisins. Mixing these dry ingredients first helps ensure even distribution of flavors throughout the dough.
Step 3: Mix Wet Ingredients
In another bowl, mix together the buttermilk and honey (or maple syrup). The buttermilk not only adds moisture but also gives your bread its unique tangy flavor.
Step 4: Create the Dough
Pour the wet mixture into the dry ingredients. Stir gently until everything is combined; don’t overmix! The dough should be slightly sticky. This is crucial because it keeps your bread tender rather than tough.
Step 5: Shape Your Loaf
Turn the dough onto a lightly floured surface and shape it into a round loaf. Don’t worry about perfection; rustic charm is what we’re going for here!
Step 6: Bake It Up
Place your loaf on a parchment-lined baking sheet and cut a shallow cross on top. This allows steam to escape while baking. Pop it into your preheated oven and bake for about 30 minutes until golden brown.
Step 7: Cool and Enjoy
Once baked, let the bread cool on a wire rack. This step lets the steam escape so you don’t end up with soggy bottoms! Slice it up once it’s cooled slightly—then enjoy every bite of your delicious homemade Irish brown bread!
Pro Tips for Making Homemade Irish Brown Bread: Quick, Rustic Comfort Awaits
Making this bread is a delightful experience, and with a few helpful tips, you can ensure your loaf turns out perfectly every time!
-
Use fresh ingredients: Ensuring your flour and baking soda are fresh will guarantee the best rise and flavor. Stale ingredients can lead to a dense loaf that doesn’t rise as intended.
-
Don’t overmix the dough: Mixing just until the ingredients are combined will result in a lighter texture. Overmixing can develop gluten, leading to a tougher bread.
-
Let it rest: Allowing your kneaded dough to rest for about 10 minutes before shaping helps relax the gluten. This results in a more tender crust when baked.
-
Check for doneness: Tap the bottom of the loaf after baking; if it sounds hollow, it’s done! This old trick ensures you don’t end up with an undercooked center.
-
Experiment with add-ins: Feel free to get creative! Adding nuts or seeds can enhance flavor and nutrition, while dried fruits like cranberries or apricots can add sweetness.
How to Serve Homemade Irish Brown Bread: Quick, Rustic Comfort Awaits
This Homemade Irish Brown Bread is not only delicious but also versatile. Presenting it well can make it even more inviting!
Garnishes
- Butter or Vegan Spread: A simple spread can elevate the bread’s flavor; serve it warm with a dollop of butter or a vegan alternative.
- Chopped Fresh Herbs: Sprinkle some fresh chives or parsley on top for an aromatic touch that brightens each slice.
Side Dishes
- Vegetable Soup: A hearty vegetable soup pairs beautifully with this rustic bread, making for a comforting meal that warms the soul.
- Salad with Citrus Dressing: A vibrant salad tossed in a zesty citrus dressing complements the earthiness of the bread, balancing flavors perfectly.
- Cheese Platter: Offering a selection of cheeses—especially sharp varieties—can provide contrasting flavors that enhance the overall experience.
- Roasted Root Vegetables: Sweet and savory roasted root vegetables make an excellent side dish that harmonizes well with the nutty notes of brown bread.
Enjoy your homemade bread journey! Each slice is not just nourishment; it’s a warm hug on a plate.
Make Ahead and Storage
This Homemade Irish Brown Bread is perfect for meal prep, allowing you to enjoy fresh, warm slices throughout the week. With its sturdy texture, it stores well and tastes delightful even after a few days.
Storing Leftovers
- Allow the bread to cool completely before storing.
- Wrap it tightly in plastic wrap or aluminum foil.
- Store it at room temperature for up to 3 days.
- For longer storage, place it in an airtight container.
Freezing
- Slice the bread before freezing for easy access.
- Wrap each slice in plastic wrap and then place them in a freezer bag.
- Label the bag with the date and contents.
- Freeze for up to 3 months; thaw overnight in the refrigerator when ready to enjoy.
Reheating
- To reheat slices, preheat your oven to 350°F (175°C).
- Place the slices directly on the oven rack or on a baking sheet.
- Heat for about 5-7 minutes until warmed through.
- For a softer crust, wrap in foil before heating.
FAQs
Here are some frequently asked questions about this delightful recipe!
How can I make Homemade Irish Brown Bread: Quick, Rustic Comfort Awaits gluten-free?
To make this bread gluten-free, substitute both flours with a gluten-free all-purpose blend that includes xanthan gum. Ensure all other ingredients are gluten-free as well.
What is the best way to enjoy Homemade Irish Brown Bread: Quick, Rustic Comfort Awaits?
This bread is delicious served warm with a pat of butter or plant-based spread. It pairs beautifully with soups or stews, making it ideal for cozy meals.
Can I omit the raisins or currants from my Homemade Irish Brown Bread?
Absolutely! If you prefer a more traditional brown bread flavor without added sweetness, feel free to leave out the raisins or currants. You can also substitute them with nuts or seeds if you like!
Final Thoughts
I hope you find joy in making this Homemade Irish Brown Bread! Its rustic charm and heartwarming flavors make it truly special. Whether enjoyed alone or shared with loved ones, this recipe is sure to bring comfort to your table. Happy baking!
Homemade Irish Brown Bread
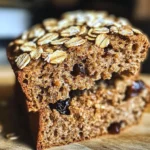
If you’re craving a cozy, rustic bread that fills your kitchen with the warm aroma of baking, look no further than this Homemade Irish Brown Bread. This delightful recipe is simple, quick, and perfect for any occasion—whether it’s a busy weeknight dinner or a relaxed weekend gathering. With its hearty whole wheat flour and chewy raisins, this bread is not only comforting but also versatile enough to pair beautifully with soups, salads, or simply enjoyed warm with butter or jam. Embrace the warmth and tradition of homemade bread while using pantry staples to create a dish that’s sure to be loved by all!
- Prep Time: 15 minutes
- Cook Time: 30 minutes
- Total Time: 45 minutes
- Yield: Approximately 12 servings 1x
- Category: Bread
- Method: Baking
- Cuisine: Irish
Ingredients
- 2 cups Whole Wheat Flour
- 1 cup All-Purpose Flour
- 1 cup Old Fashioned Rolled Oats
- 1 cup Plant-Based Milk + 1 tablespoon Lemon Juice
- 1 teaspoon Baking Soda
- 1 teaspoon Salt
- 2 tablespoons Honey or Maple Syrup
- 1 tablespoon Caraway Seeds
- 1 cup Raisins or Currants
Instructions
- Preheat your oven to 425°F (220°C).
- In a large mixing bowl, whisk together the whole wheat flour, all-purpose flour, rolled oats, baking soda, salt, caraway seeds, and raisins.
- In another bowl, mix the plant-based milk with lemon juice and honey until combined.
- Pour the wet mixture into the dry ingredients and stir gently until just combined; avoid overmixing.
- Turn the dough onto a lightly floured surface and shape it into a round loaf.
- Place on a parchment-lined baking sheet and cut a shallow cross on top.
- Bake for approximately 30 minutes until golden brown.
- Allow cooling on a wire rack before slicing.
Nutrition
- Serving Size: 1 slice (70g)
- Calories: 140
- Sugar: 4g
- Sodium: 200mg
- Fat: 2g
- Saturated Fat: 0g
- Unsaturated Fat: 2g
- Trans Fat: 0g
- Carbohydrates: 28g
- Fiber: 4g
- Protein: 5g
- Cholesterol: 0mg