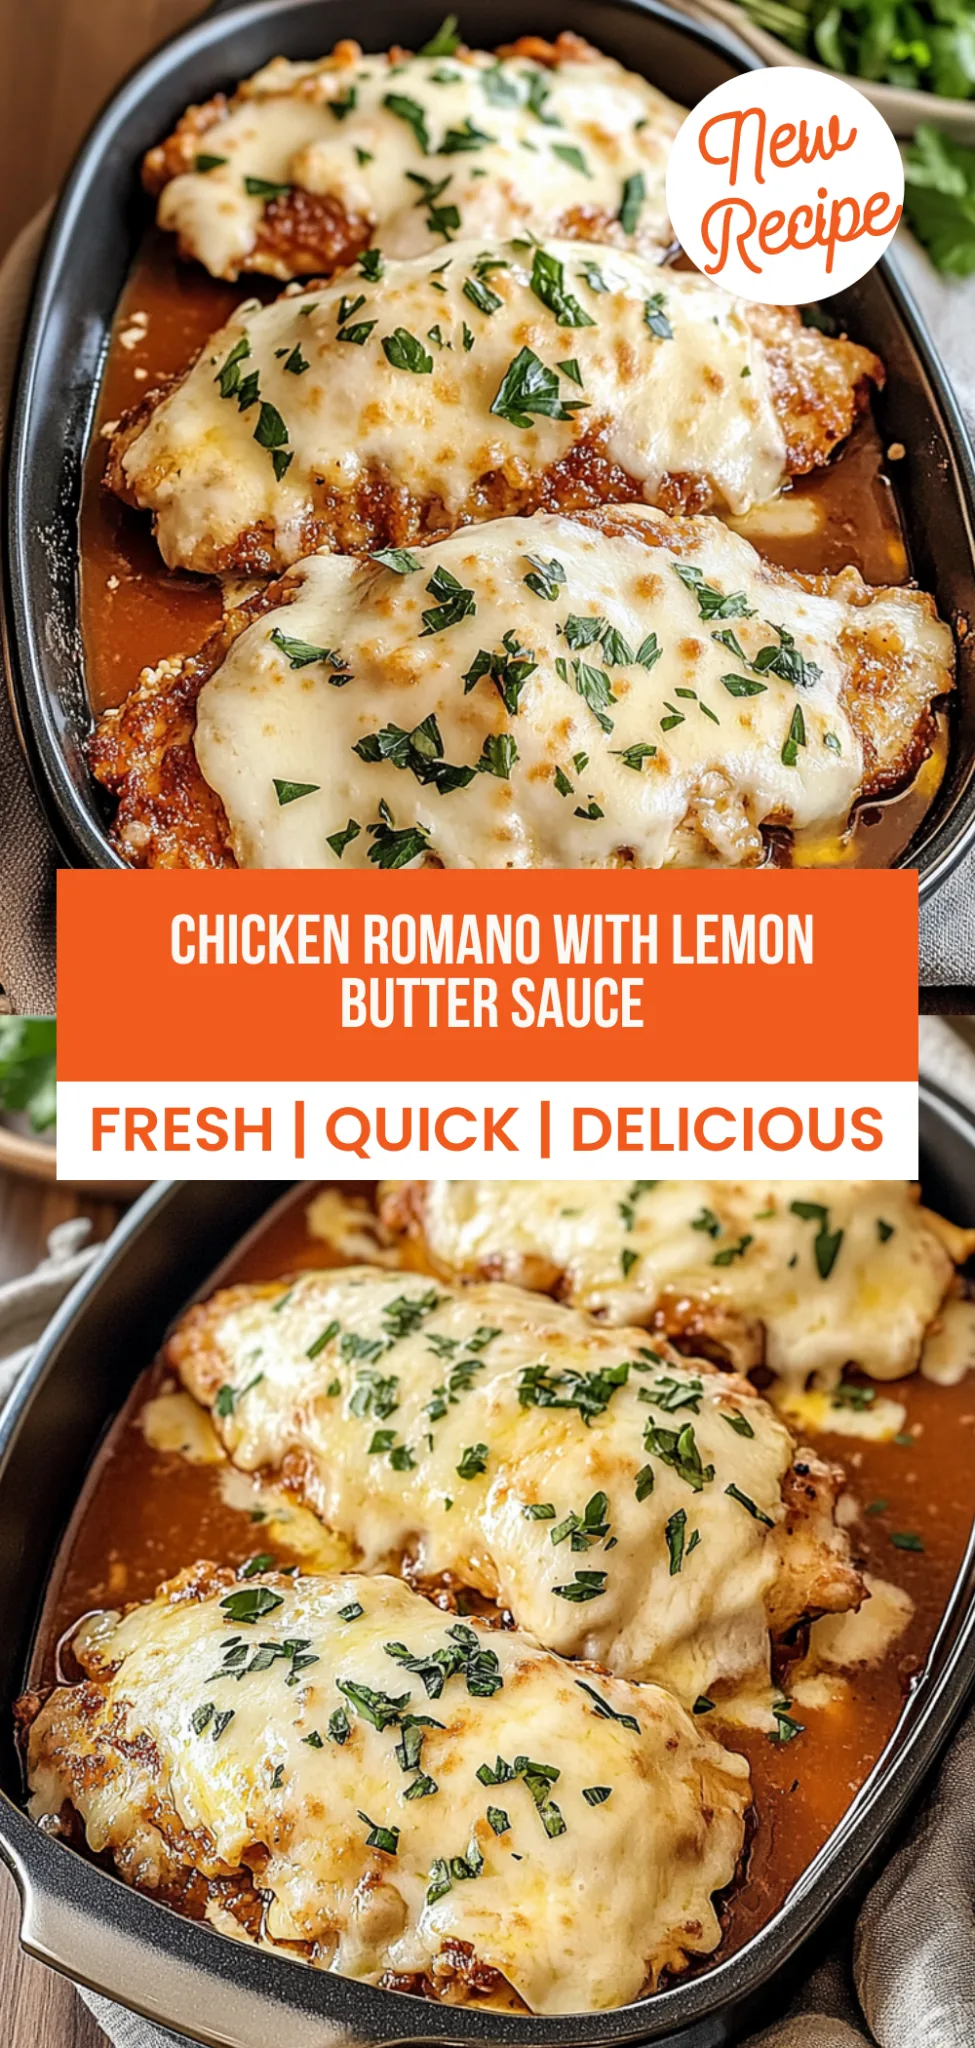
Chicken Romano: Crispy and Creamy Delight You’ll Love
There’s nothing quite like the satisfying crunch of breaded chicken paired with a creamy Romano cheese sauce that dances on your taste buds! This Chicken Romano is crispy, savory, fresh, and loaded with protein—each serving boasts about 40 grams to fuel your day. I crafted this dish during one of those hectic weeks when I needed a quick yet hearty meal that would keep my family happy and satisfied. It’s become a staple in our home, easily filling bellies while keeping an eye on our macros with just 550 calories per serving.
I still remember the first time I served this dish to my family. It was a chilly Sunday evening, and as I pulled the chicken from the oven, my teenager exclaimed, “Wow, that smells amazing!” The rich aroma filled the kitchen, and I could hardly wait to dig in. What makes my Chicken Romano special is the use of high-quality Romano cheese that gives it a unique flavor twist compared to other chicken dishes. To my delight, after devouring their plates, both kids asked for seconds—an absolute win in our household!
Ingredients for the Chicken Romano
Each ingredient in this dish plays an essential role in flavor and texture. Here’s what you’ll need:
- 4 pieces boneless, skinless chicken breasts (pounded to 1/2 inch thickness): Provides a tender and juicy base for the dish.
- 1 cup all-purpose flour (for dredging): Creates a light coating that helps the breading adhere.
- 2 large eggs (beaten): Acts as a binding agent to ensure the breadcrumbs stick perfectly.
- 1 cup bread crumbs (preferably Italian seasoned): Adds a delightful crunch and enhances the savory profile.
- 1/2 cup grated Romano cheese (for coating): Infuses a rich, nutty flavor into the crispy crust.
- 1/4 cup olive oil (for frying): Essential for achieving a golden-brown, crispy exterior.
Step-by-Step Instructions
I recommend starting by preheating your oven to 375°F (190°C) so it’s ready when you’re finished cooking the chicken — this way, you can pop everything in at once and enjoy a hot meal without delay.
Step 1: Preheat your oven to 375°F (190°C). While that heats up, take your boneless, skinless chicken breasts and pound them to an even thickness of 1/2 inch. This step is crucial for ensuring that the chicken cooks evenly, avoiding any undercooked or overcooked parts. I find using a meat mallet works best for this; just be gentle to keep the meat intact.
Step 2: Next, set up your dredging station: place the all-purpose flour in one shallow dish, beat the two large eggs in another, and combine the bread crumbs with the grated Romano cheese in a third dish. Dredge each chicken breast first in the flour, shaking off any excess, then dip it into the beaten eggs to coat thoroughly. Finally, press it into the bread crumb and cheese mixture until well coated. This three-step process builds a delicious crispy exterior that my family loves — don’t skip on getting an even coating!
Step 3: In a large skillet, heat your olive oil over medium heat until it’s shimmering but not smoking. Carefully add the breaded chicken breasts to the pan and cook for about 5-7 minutes on each side. You want them golden brown and cooked through, with no pink remaining inside; they should reach an internal temperature of 165°F (74°C). Once they’re done, transfer them to a baking dish. I usually like to do this in batches if my skillet isn’t large enough; overcrowding can lead to steaming rather than frying!
Step 4: In the same skillet you used for frying, add minced garlic and sauté for about 1 minute until fragrant — this builds serious flavor! Be careful not to let it burn, as burnt garlic can ruin your sauce. After that minute, pour in the heavy cream and bring it to a gentle simmer while stirring continuously.
Step 5: Stir in the grated Romano cheese along with salt and black pepper until everything is melted and smooth. This creamy sauce is what ties your dish together; I love how it clings beautifully to the chicken! Make sure there are no lumps left from the cheese for that perfect velvety texture.
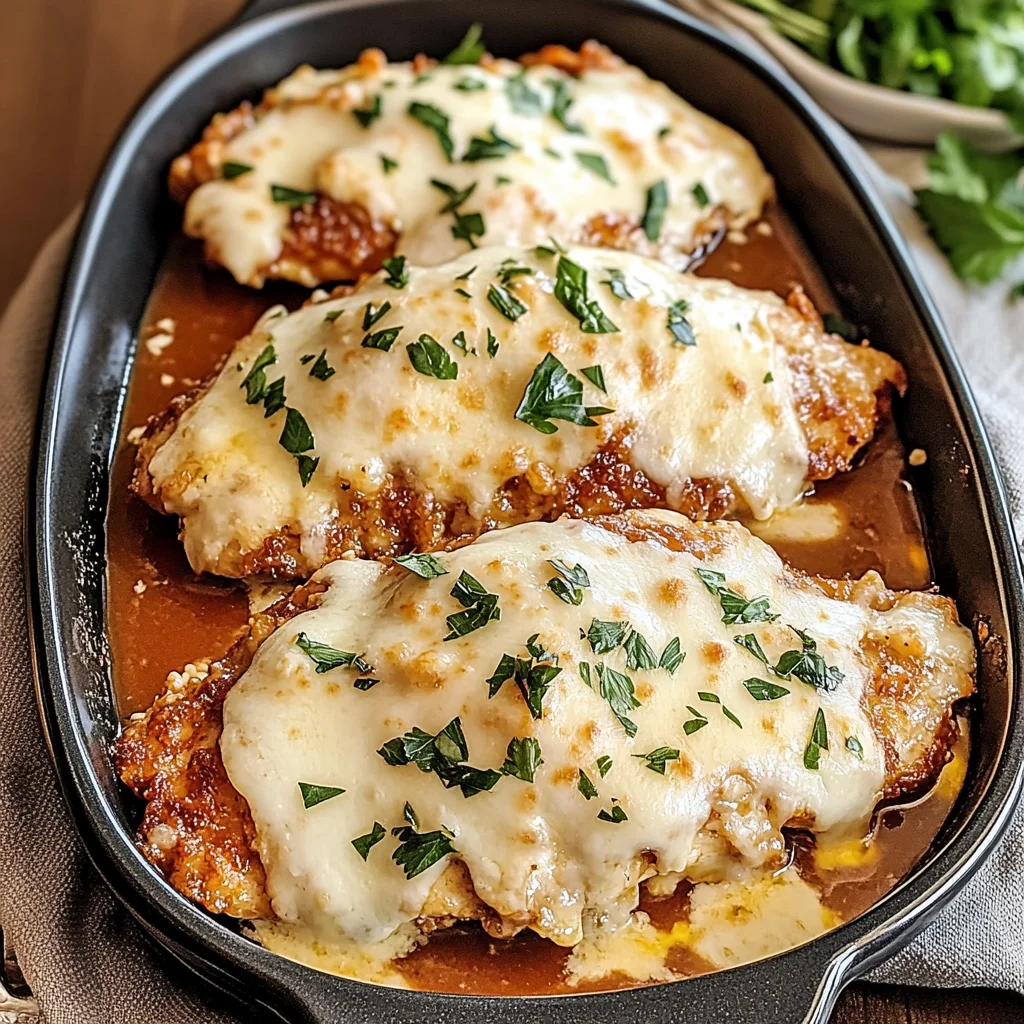
Step 6: Now pour that luscious cheese sauce over your cooked chicken in the baking dish, ensuring each piece is generously covered — don’t skimp! It’s time to bake everything together; pop it into your preheated oven for about 15-20 minutes until bubbly and golden on top. The aroma will be irresistible at this stage!
Step 7: Finally, once out of the oven, garnish with freshly chopped parsley before serving. This adds a pop of color and freshness that brightens up your dish beautifully. Enjoying Chicken Romano straight from the oven is always a treat my family looks forward to!
What to Serve with Chicken Romano
This dish is already incredibly filling and balanced, but these sides add extra variety and nutrition to round out your meal perfectly.
Garlic Parmesan Roasted Broccoli: Tossed in olive oil, minced garlic, and grated Parmesan cheese, this roasted broccoli brings a crunchy texture that complements the creamy sauce of the Chicken Romano. The slight bitterness of the broccoli balances the richness of the dish while providing a boost of vitamins C and K. It’s a family favorite that I often prepare on busy weeknights since it cooks quickly alongside the chicken.
Lemon Herb Quinoa: Fluffy quinoa is cooked with vegetable broth and tossed with fresh herbs and a squeeze of lemon juice for brightness. This protein-packed side offers about 8 grams of protein per serving and echoes the Italian flavors in the Chicken Romano without overwhelming them. I love making a big batch of quinoa for meal prep; it keeps well in the fridge and pairs beautifully with many dishes throughout the week.
Creamy Mashed Potatoes: Whipped with heavy cream and a hint of garlic, these creamy mashed potatoes provide a comforting contrast to the crispy chicken. Their smooth texture and richness mimic the creamy Romano sauce, creating a harmonious dining experience. For added macros, I often mix in some Greek yogurt for extra protein without sacrificing taste, making them perfect for fueling up after an active day.
Caprese Salad: A refreshing mix of ripe tomatoes, fresh basil, and mozzarella drizzled with balsamic glaze makes for an ideal light side. The bright acidity from the tomatoes cuts through the richness of the Chicken Romano while echoing its Italian roots. Plus, it’s loaded with antioxidants and provides healthy fats from the cheese; my kids love it so much that they often ask for it at every dinner!
Storage & Serving Tips
To store your Chicken Romano for meal prep, place the cooked chicken breasts in an airtight container in the fridge for up to 4 days. For optimal freshness, keep the creamy Romano cheese sauce in a separate airtight container, as it can cause the breaded chicken to become soggy. If you have any leftover bread crumbs or grated cheese that weren’t used during cooking, store those in individual small containers to maintain their texture and flavor.
When reheating, it’s best to crisp up the chicken again by placing it in a preheated oven at 400°F for about 10-12 minutes until heated through and crispy. The sauce can be gently reheated on the stove over low heat for about 5 minutes, stirring occasionally until warmed, but avoid boiling it to maintain its creamy texture. Microwaving the chicken is not recommended as it makes them soft and disappointing; instead, always opt for the oven method when trying to restore their original quality.
Pro tip: To batch cook Chicken Romano for the week, consider doubling the recipe on a Sunday and portioning it into meal prep containers. Family members can self-assemble their bowls with a base of whole grains like brown rice or quinoa, topped with sliced chicken and drizzled with sauce. For variety throughout the week, swap out chicken for turkey or use eggplant cutlets as a vegetarian option. To keep your breaded chicken crispy during storage, avoid stacking them directly on top of each other; instead, use parchment paper between layers in your container.
Conclusion
Chicken Romano has become one of those recipes I make at least twice a month because it’s genuinely easy, incredibly satisfying, and delivers 550 calories per serving without sacrificing flavor. The key to its deliciousness lies in the perfectly pounded chicken breasts that create an irresistible crispy coating, making it stand out from typical breaded chicken dishes. Give this one a try this week. I promise it’ll become a regular rotation meal in your house too.
Chicken Romano
Ingredients
Method
- Preheat the oven to 375°F (190°C).
- Pound the chicken breasts to an even thickness of 1/2 inch.
- Dredge each chicken breast in flour, then dip in beaten eggs, and finally coat with a mixture of bread crumbs and grated Romano cheese.
- In a large skillet, heat olive oil over medium heat.
- Add the breaded chicken breasts and cook for about 5-7 minutes on each side, or until golden brown and cooked through.
- Transfer the cooked chicken to a baking dish.
- In the same skillet, add minced garlic and sauté for about 1 minute.
- Pour in the heavy cream and bring to a simmer.
- Stir in the grated Romano cheese, salt, and pepper until the cheese is melted and the sauce is smooth.
- Pour the cheese sauce over the chicken in the baking dish.
- Bake in the preheated oven for 15-20 minutes, until bubbly and golden on top.
- Garnish with chopped parsley before serving.