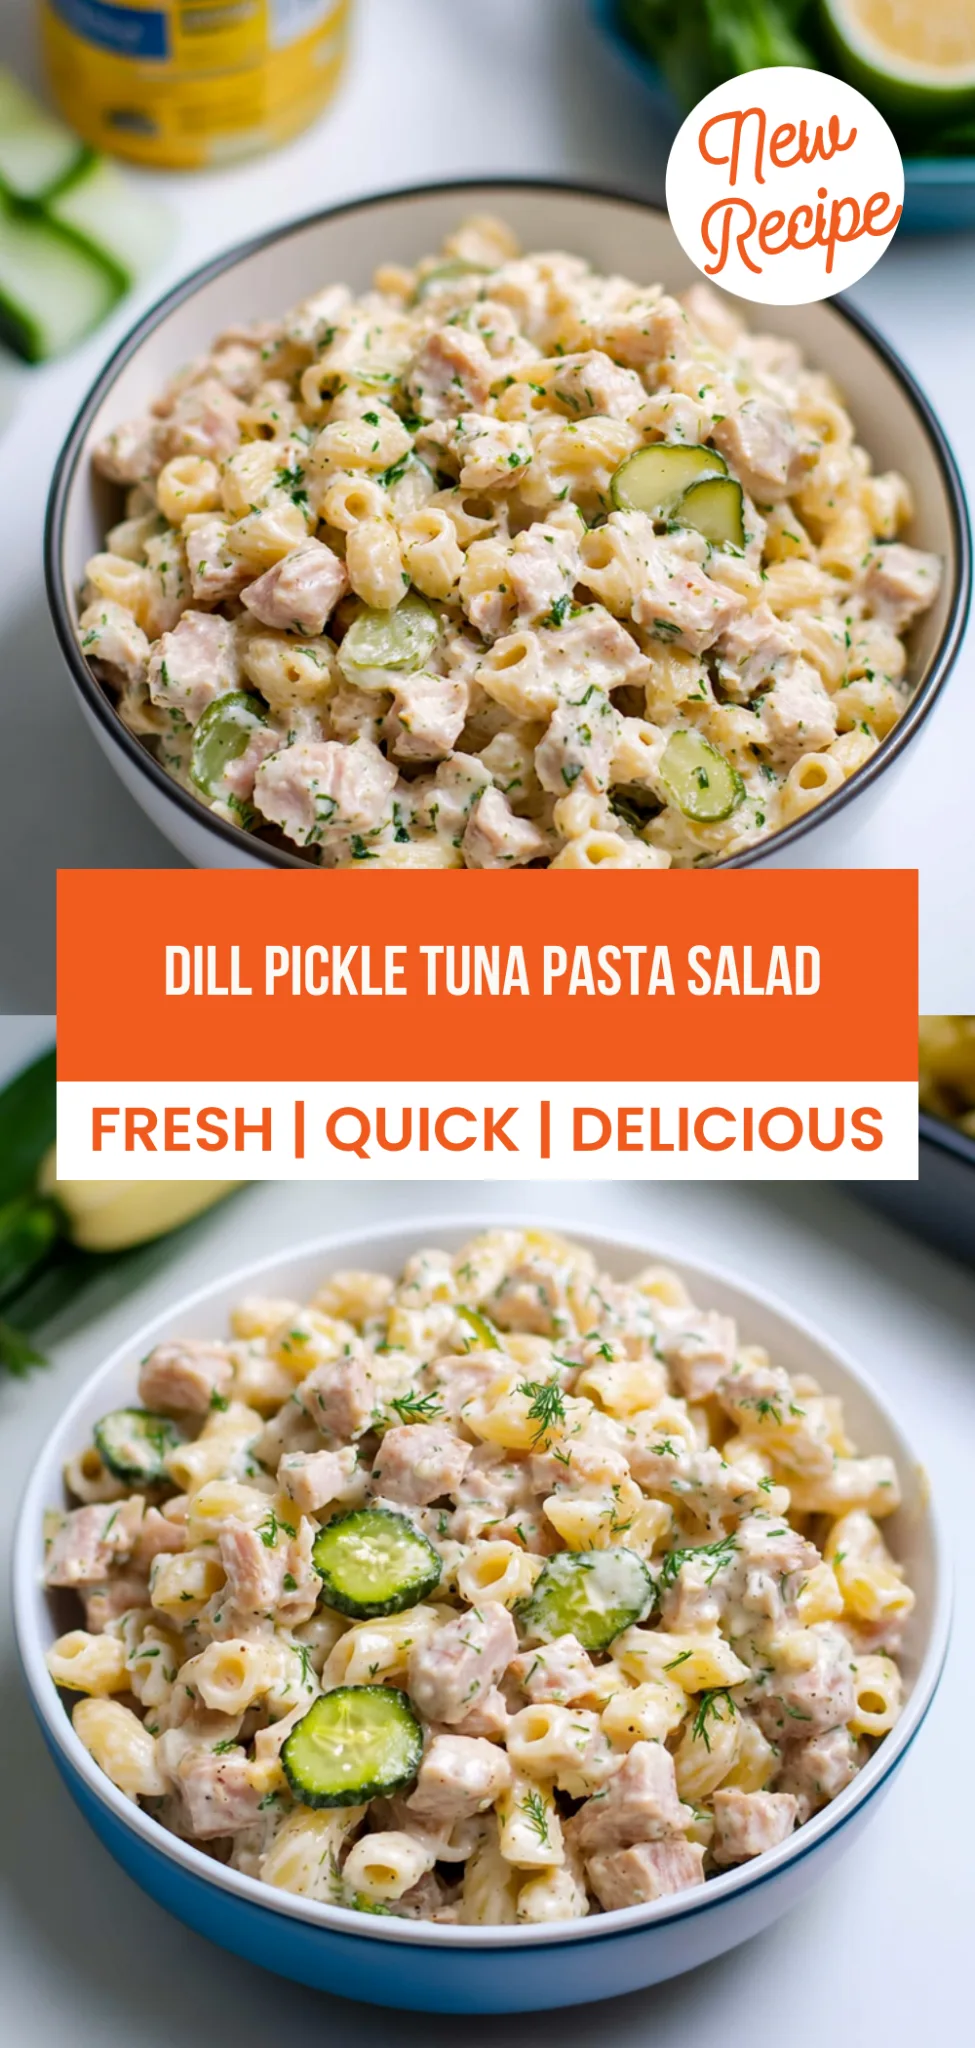
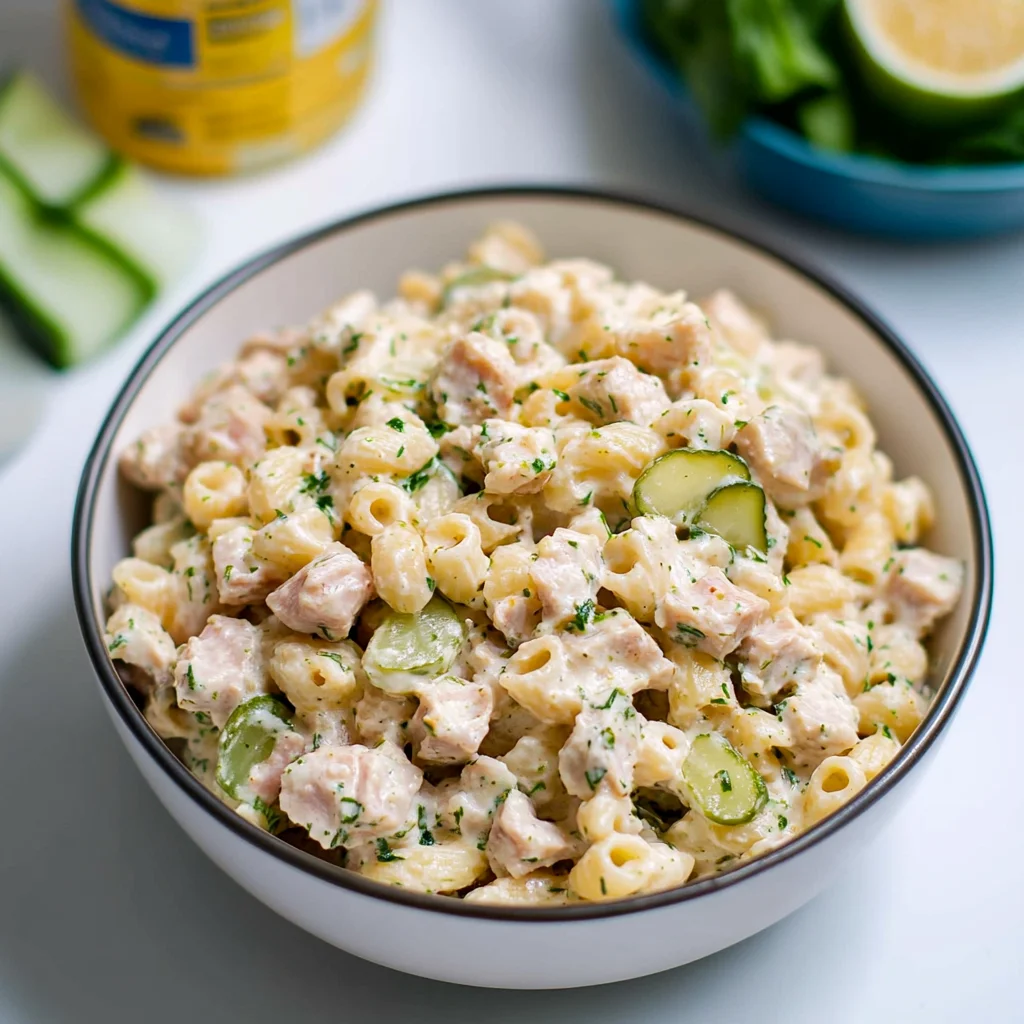
Dill Pickle Tuna Pasta Salad: Refreshingly Zesty Goodness
When I think of summer lunches that pack a punch, my mind instantly drifts to the tangy crunch of my Dill Pickle Tuna Pasta Salad. It’s a delightful mix of flavors and textures—crispy, savory, fresh, and loaded with protein from the tuna. This recipe came to life during one of those hectic weeks when meal prep became essential; I wanted something quick yet satisfying that would keep my family’s energy up without compromising on taste. With only 320 calories per serving, it’s a guilt-free indulgence that hits the spot every time.
I vividly remember the first time I made this dish; it was a sunny Saturday afternoon, and my teenagers were lounging around after a long week of school. As I tossed together the creamy dressing and folded in the dill pickles, my youngest exclaimed, “It smells amazing in here!” The key twist that sets this pasta salad apart is the addition of crunchy dill pickles—an unexpected burst of flavor that elevates the entire dish. By the end of our picnic in the backyard, both kids were asking for seconds, with my oldest declaring it “the best pasta salad ever.”
Ingredients for the Dill Pickle Tuna Pasta Salad
Each ingredient in this dish plays an essential role in flavor and texture. Here’s what you’ll need:
8 oz elbow macaroni (or any pasta of choice): Provides a hearty base that holds all the flavors together.
1 can tuna (drained): Offers a protein-packed element with a savory, umami punch.
1 cup dill pickles (chopped): Infuses a tangy crunch that brightens the whole salad.
1 cup celery (chopped): Adds refreshing crispness and a slight earthiness.
1/2 cup red onion (finely chopped): Contributes a mild sweetness and a touch of color.
1/2 cup mayonnaise (or Greek yogurt): Creates a creamy dressing that binds the ingredients beautifully.
1 tbsp dill (fresh or dried): Brings an aromatic herbal note that complements the pickles perfectly.
1 tbsp lemon juice (freshly squeezed): Enhances brightness and balances the richness of the mayo.
1/2 tsp salt (to taste): Elevates all the flavors by enhancing their natural taste.
1/4 tsp black pepper (to taste): Adds a subtle heat and depth to the dressing.
Step-by-Step Instructions
I recommend starting with the pasta since it takes the longest to cook, ensuring everything is ready at the same time for your salad.
Step 1: Bring a large pot of salted water to a boil over high heat. Once boiling, add 8 oz of elbow macaroni and cook according to package instructions until al dente, which usually takes about 7–9 minutes. Be sure to stir occasionally to prevent sticking. Once done, drain the pasta in a colander and rinse it under cold water until it’s cool; this stops the cooking process and helps prevent mushy pasta in your salad.
Step 2: In a large mixing bowl, combine the drained can of tuna, chopped dill pickles, celery, and finely chopped red onion. I like to break up the tuna into smaller pieces with a fork for better distribution throughout the salad. Mixing these ingredients first allows their flavors to meld before adding the pasta, making every bite deliciously tangy and crunchy.
Step 3: Add the cooled pasta to your mixing bowl with the tuna and vegetables. Gently fold it together using a spatula or large spoon—be careful not to mash the ingredients. This step ensures that each piece of pasta is coated with all those vibrant flavors from the tuna and veggies that you just mixed.
Step 4: In a separate bowl, whisk together 1/2 cup of mayonnaise (or Greek yogurt), 1 tbsp of dill, 1 tbsp of freshly squeezed lemon juice, 1/2 tsp of salt, and 1/4 tsp of black pepper until smooth and well combined. I prefer using Greek yogurt for a lighter option without sacrificing creaminess; it also adds extra protein! This dressing is what brings everything together, so make sure it’s mixed thoroughly before proceeding.
Step 5: Pour the dressing over the pasta salad mixture and mix everything until well coated. Use gentle folding motions to ensure you don’t break apart any ingredients—this way, every bite stays intact and full of flavor. The creamy dressing balances out the crunchy veggies and tender pasta perfectly for an ideal texture.
Step 6: Cover the salad with plastic wrap or a lid and refrigerate for at least 30 minutes. This chilling time allows all those fresh flavors to meld beautifully together—trust me; it’s worth the wait! For best results, I usually let it chill for up to an hour if I have time; it gives it that extra refreshing taste when served cold.
Step 7: After chilling, serve your Dill Pickle Tuna Pasta Salad straight from the fridge for maximum freshness. It’s perfect for lunch or at picnics! Enjoy every delicious bite!
What to Serve with Dill Pickle Tuna Pasta Salad
This bowl is already incredibly filling and balanced, but these sides add extra variety and nutrition to round out your meal perfectly.
Crispy Garlic Green Beans: These green beans are sautéed in olive oil with minced garlic until tender and slightly crispy. Their fresh crunch provides a delightful contrast to the creamy pasta salad, while the garlicky flavor complements the dill pickle notes beautifully. With only about 30 calories per serving and a good dose of vitamin K, they’re a family favorite that adds both nutrition and flavor without weighing you down.
Quinoa Tabbouleh: A refreshing mix of quinoa, parsley, tomatoes, and cucumbers dressed in lemon juice creates a bright side that echoes the fresh elements in the pasta salad. The fluffy quinoa adds an extra layer of protein (about 8 grams per cup) while keeping the dish light and zesty. This is a go-to meal prep option for our busy weeknights, as it holds up well in the fridge and tastes even better after marinating overnight.
Avocado Chickpea Salad: Creamy avocado mixed with chickpeas, red onion, lime juice, and spices makes for a rich yet nutritious side dish. The healthy fats from the avocado complement the protein from the tuna salad while enhancing its creaminess. Packed with fiber and over 6 grams of protein per serving, this salad is perfect for those looking to boost their macros without sacrificing flavor—my kids love it as an easy snack option too!
Corn on the Cob with Herb Butter: Grilled corn brushed with herb-infused butter adds a sweet smokiness that enhances the dill flavors in your pasta salad. The juicy kernels provide a satisfying bite alongside the creamy textures of your main dish. Each ear has around 90 calories and offers some fiber to keep you feeling full—it’s always a hit during our summer barbecues!
Storage & Serving Tips
To store your Dill Pickle Tuna Pasta Salad for meal prep, place the pasta and tuna mixture in an airtight container and refrigerate it for up to 4 days. For optimal freshness, keep the vegetables—dill pickles, celery, and red onion—in a separate container to maintain their crunch. Additionally, store the dressing made from mayonnaise (or Greek yogurt), dill, lemon juice, salt, and black pepper in a small jar or container to prevent the pasta from getting soggy.
When it comes to reheating, you can enjoy this salad cold or at room temperature, which preserves the texture of the pasta and veggies. If you prefer a warm dish, gently heat the pasta and tuna mixture in a saucepan over low heat until warmed through, about 3-5 minutes. Avoid microwaving as it can make the pasta mushy and unappealing. Remember that the chopped vegetables should be added fresh right before serving for maximum crunch.
Pro tip: Batch cook this recipe by doubling the ingredients on a Sunday and portioning it into individual containers for quick grab-and-go meals throughout the week. Family members can easily self-assemble their bowls by mixing in fresh veggies each day. For variety, consider swapping out the elbow macaroni for whole wheat or chickpea pasta, or replace tuna with canned chicken for a different protein profile. To keep your dill pickles crisp during meal prep storage, always add them right before serving instead of mixing them in advance.
Conclusion
This Dill Pickle Tuna Pasta Salad has become one of those recipes I make at least twice a month because it’s genuinely easy, incredibly satisfying, and delivers 320 calories per serving without sacrificing flavor. The addition of crunchy dill pickles gives this salad a tangy twist that sets it apart from typical pasta salads. Give this one a try this week. I promise it’ll become a regular rotation meal in your house too.
Dill Pickle Tuna Pasta Salad
Ingredients
Method
- Bring a large pot of salted water to a boil. Add the elbow macaroni and cook according to package instructions until al dente.
- Drain the pasta in a colander and rinse under cold water to cool.
- In a large mixing bowl, combine the drained tuna, chopped dill pickles, celery, and red onion.
- Add the cooled pasta to the mixing bowl.
- In a separate bowl, whisk together the mayonnaise, dill, lemon juice, salt, and black pepper.
- Pour the dressing over the pasta salad and mix until everything is well coated.
- Cover the salad and refrigerate for at least 30 minutes to allow the flavors to meld.
- Serve chilled and enjoy!