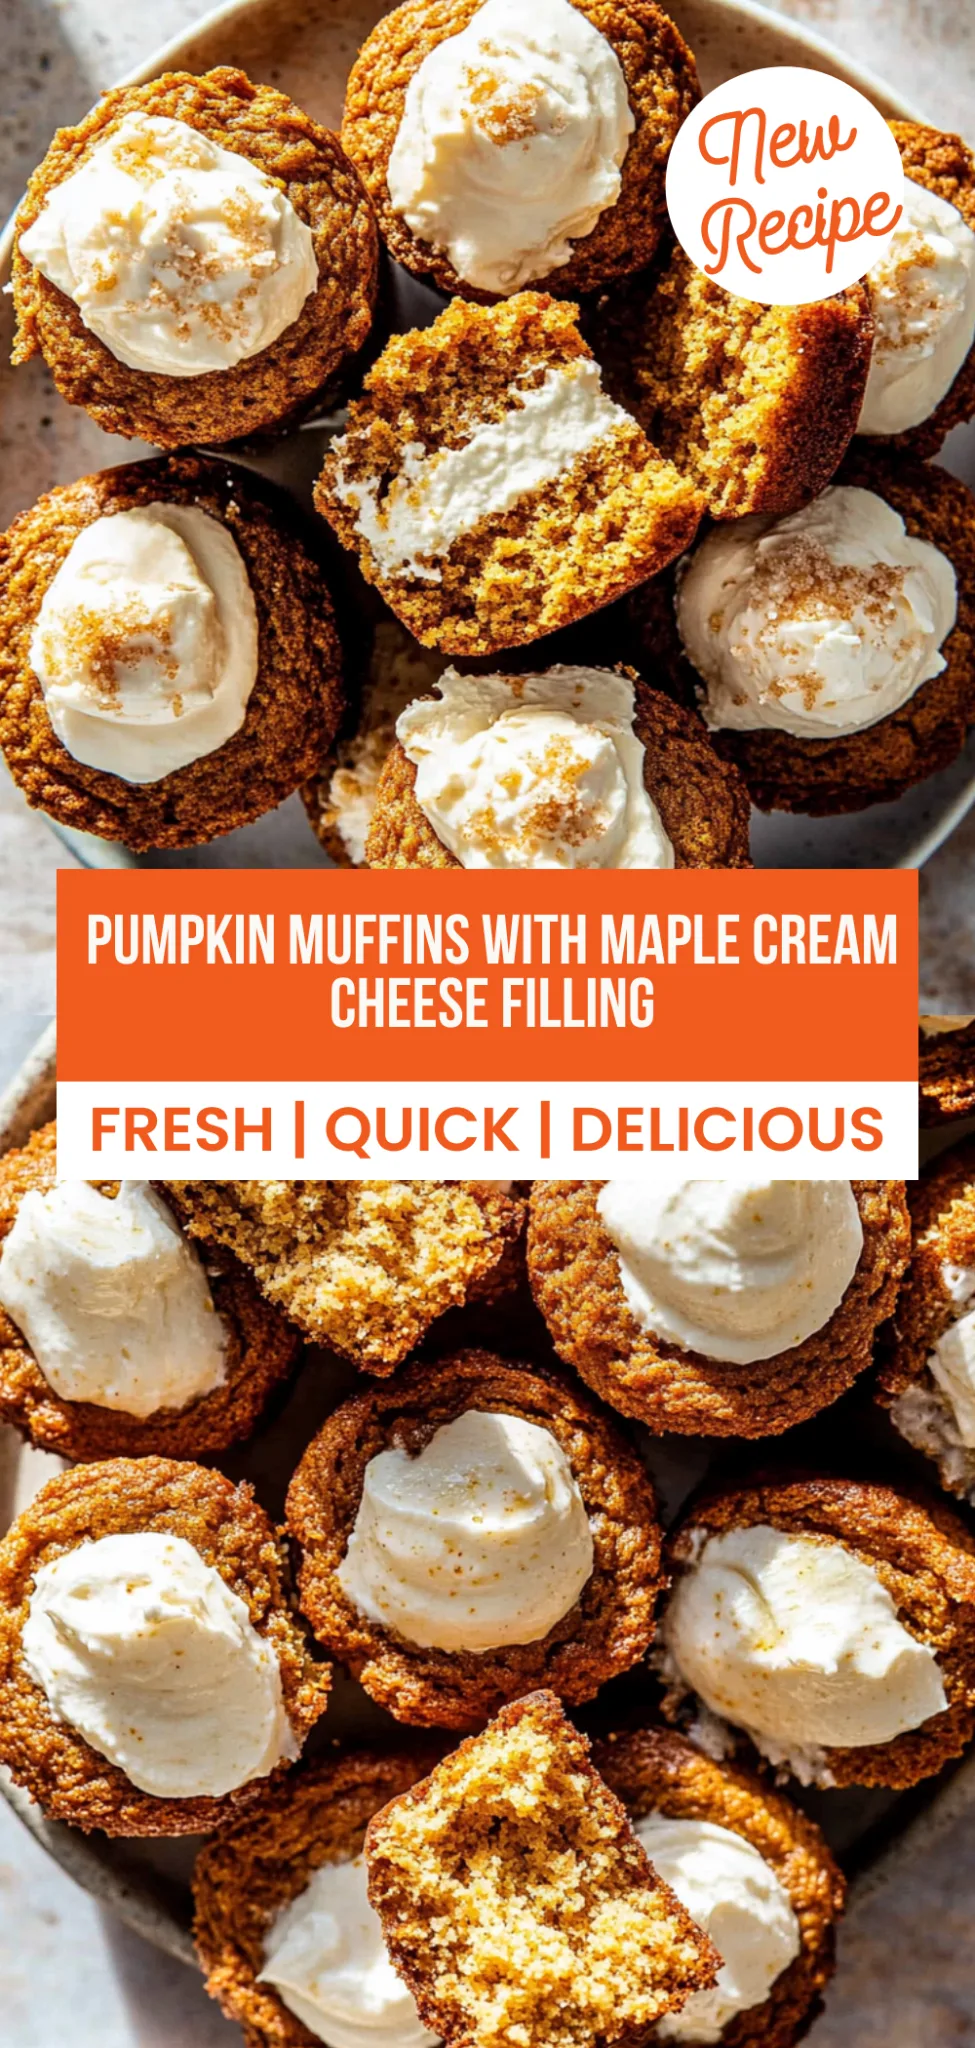
Pumpkin Muffins with Maple Cream Cheese Filling: Irresist…
There’s nothing quite like the warm, inviting aroma of baking pumpkin muffins wafting through the house, especially when they’re filled with a luscious maple cream cheese filling! These muffins are delightfully moist, perfectly spiced, and satisfyingly sweet, making them an irresistible treat for fall. Packed with a wholesome 210 calories each, they offer a delightful balance of flavor and nutrition—think of them as your new go-to snack that’s crispy, creamy, cozy, and loaded with protein. I created this recipe during one of those hectic weeks when my schedule was jam-packed but my cravings for something comforting were at an all-time high.
I remember the first time I baked these Pumpkin Muffins with Maple Cream Cheese Filling; it was a chilly Sunday afternoon in October. My youngest daughter walked into the kitchen, her eyes lighting up as she exclaimed, “Wow, it smells like autumn in here!” We shared a laugh as I pulled the warm muffins from the oven, eager to see their reactions. The twist that sets these muffins apart is the rich maple cream cheese filling that adds a decadent touch without overpowering the pumpkin flavor. To my delight, my son asked for seconds—his plate empty in seconds—declaring these his new favorite fall treat!
Ingredients for the Pumpkin Muffins with Maple Cream Cheese Filling
Each ingredient in this dish plays an essential role in flavor and texture. Here’s what you’ll need:
- 1 cup all-purpose flour: Provides structure and stability to the muffins.
- 1 cup pumpkin puree (canned or homemade): Infuses moisture and rich pumpkin flavor.
- 1/2 cup brown sugar (packed): Adds depth of sweetness and a hint of molasses.
- 1/2 cup granulated sugar: Balances the flavors with a clean sweetness.
- 1/2 cup vegetable oil: Ensures moistness and a tender crumb.
- 2 large eggs: Acts as a binding agent, giving structure to the muffins.
- 1 teaspoon baking powder: Helps the muffins rise and become fluffy.
- 1 teaspoon baking soda: Reacts with the pumpkin to enhance leavening.
- 1 teaspoon ground cinnamon: Delivers warm, aromatic spice that complements pumpkin.
- 1/2 teaspoon ground nutmeg: Adds a subtle, nutty warmth to the flavor profile.
- 1/2 teaspoon salt: Enhances all the other flavors and balances sweetness.
Step-by-Step Instructions
I recommend starting with the filling first since it needs to be smooth and creamy before you assemble everything, making the process easier and more efficient.
Step 1: In a mixing bowl, beat the softened cream cheese until smooth. This step is crucial because a well-mixed filling will create a delightful contrast with the moist pumpkin muffin base. I usually use an electric mixer on medium speed for about 2 minutes to ensure there are no lumps. Once it’s creamy, add the maple syrup and vanilla extract, then mix until well combined. The sweetness of the maple syrup adds a lovely flavor that pairs perfectly with pumpkin.
Step 2: Preheat your oven to 350°F (175°C) and grease a muffin tin. Greasing the pan is vital to prevent sticking; I prefer using non-stick spray or a light coat of vegetable oil for easy removal later. As the oven preheats, it gives you time to prepare your muffin batter without any downtime, ensuring everything flows smoothly.
Step 3: In a large bowl, whisk together the flour, baking powder, baking soda, cinnamon, nutmeg, and salt. This step builds serious flavor while also ensuring even distribution of the leavening agents; I like to whisk thoroughly for at least 30 seconds. It’s important not to skip this step because if you don’t combine these dry ingredients well enough, your muffins might not rise properly.
Step 4: In another bowl, mix the pumpkin puree, brown sugar, granulated sugar, vegetable oil, and eggs until smooth. I usually use a spatula for this because it helps me scrape down the sides to incorporate everything fully — you want this mixture to be silky and lump-free. This is where all that rich pumpkin flavor comes together, and I find that using room temperature eggs helps everything blend more seamlessly.
Step 5: Gradually add the dry ingredients to the wet ingredients, stirring until just combined. Be careful not to overmix; you want your batter to remain fluffy for those perfect muffins! A few small lumps are totally fine here—trust me; they will bake out beautifully in the oven.
Step 6: Fill each muffin cup halfway with the batter. I like using an ice cream scoop for this step; it makes portioning super easy and keeps things tidy! After filling halfway up, gently tap the muffin tin on your countertop to remove any air bubbles trapped in the batter.
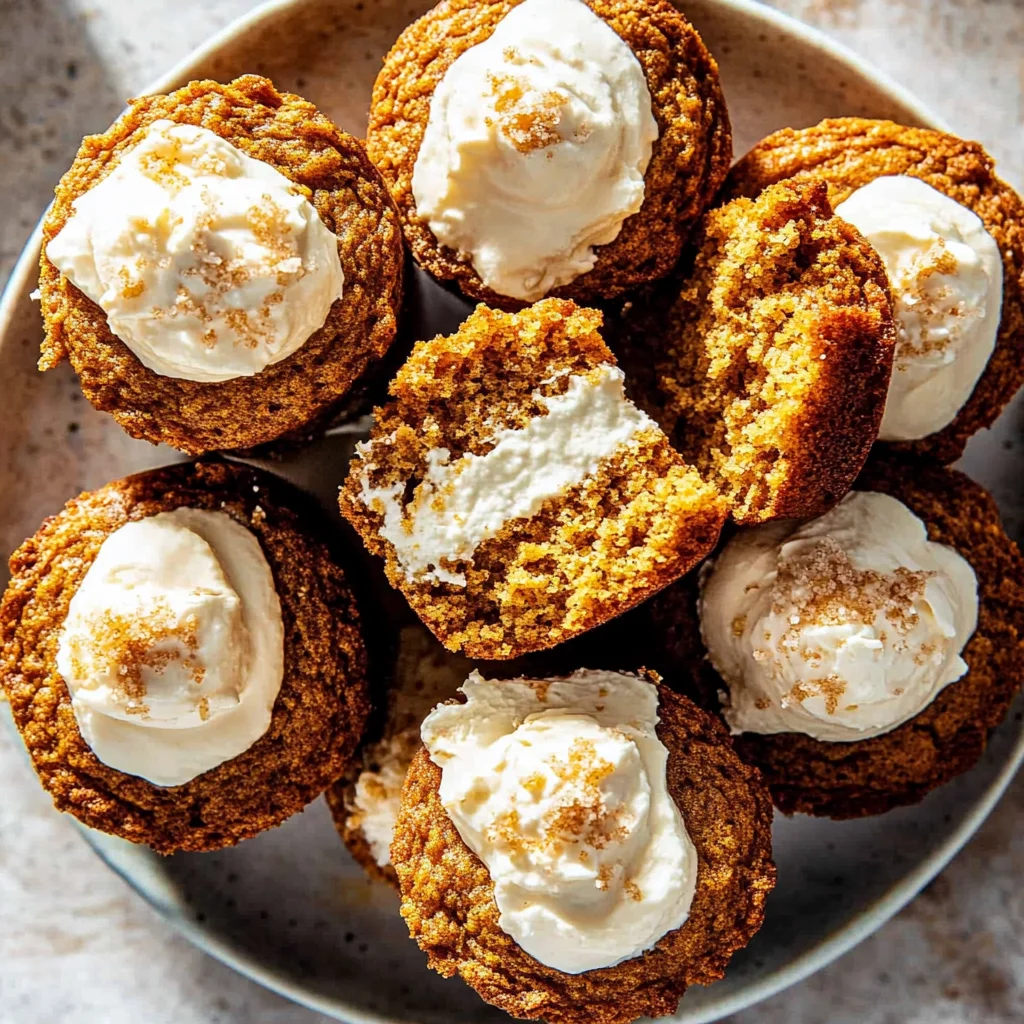
Step 7: Add a spoonful of the maple cream cheese filling on top of the batter in each cup. Don’t be shy here; this sweet surprise is what makes these muffins truly special! Just make sure not to overfill them since you’ll be adding more batter on top.
Step 8: Top with remaining batter until cups are about 3/4 full. Again, using the ice cream scoop works wonders here—just be careful not to disturb that lovely cream cheese filling underneath! This layering technique is key for achieving that perfect balance of flavors when they bake.
Step 9: Bake in the preheated oven for 20-25 minutes or until a toothpick inserted comes out clean. Keep an eye on them towards the end—when they’re golden brown and spring back slightly when touched but still moist inside is ideal! I recommend checking at around 20 minutes so you don’t risk overbaking them.
Step 10: Let cool in the pan for 5 minutes before transferring to a wire rack. Allowing them to cool slightly helps set their structure while making them easier to remove without breaking apart. Trust me; you’ll want that warm muffin experience as you dig into these delicious treats!
What to Serve with Pumpkin Muffins with Maple Cream Cheese Filling
This dish is already incredibly filling and balanced, but these sides add extra variety and nutrition to round out your meal perfectly.
Apple Walnut Salad: A fresh salad made with crisp apples, crunchy walnuts, mixed greens, and a light vinaigrette offers a refreshing contrast to the sweetness of the muffins. The tartness of the apples complements the maple flavor while the walnuts add healthy fats and protein—about 4 grams per serving. This salad is a staple at our fall gatherings and adds a vibrant touch to any meal.
Quinoa Pilaf: Fluffy quinoa cooked with sautéed onions, garlic, and seasonal vegetables provides an excellent source of complex carbohydrates and additional protein—around 8 grams per cup. Its nutty flavor pairs beautifully with the pumpkin muffins, enhancing their earthy tones while adding a satisfying texture. We often prepare this as a meal prep option for busy weeks when we need nutritious sides on hand.
Cinnamon-Spiced Roasted Sweet Potatoes: These sweet potatoes are cubed and roasted with cinnamon and a drizzle of olive oil until caramelized and tender. Their natural sweetness echoes the flavors of the muffins while providing fiber and vitamins A and C—making them a nutritious complement rich in antioxidants. This dish has become my family’s favorite side during fall festivals; they disappear quickly at our dinner table!
Creamy Avocado Dip: Made from ripe avocados blended with lime juice, garlic, and Greek yogurt, this dip adds a tangy creaminess that balances the sweetness of the muffins. Pairing it not only introduces heart-healthy fats (around 5 grams per serving) but also elevates your meal prep game since it can be enjoyed with various snacks throughout the week. It’s always a hit during brunch gatherings at my house!
Storage & Serving Tips
To store your Pumpkin Muffins with Maple Cream Cheese Filling, allow them to cool completely before placing them in an airtight container. These muffins will stay fresh in the fridge for up to 5 days. If you want to keep the filling at its best, store the maple cream cheese filling separately in a small airtight container. This keeps it from making the muffins soggy and allows you to enjoy that creamy goodness fresh each time.
When reheating, it’s best to warm the muffins in a 350°F oven for about 8–10 minutes until they’re heated through and regain their moist texture. Avoid microwaving, as it makes the muffins soft and disappointing. For the maple cream cheese filling, simply pull it out of storage and let it sit at room temperature for a few minutes before spreading it on your warm muffin.
Pro tip: To batch cook these muffins for the week, consider doubling the recipe and portioning them into individual containers after they cool. This way, family members can self-assemble their own breakfast by adding a dollop of maple cream cheese filling as needed. For variety throughout the week, try swapping in whole wheat flour instead of all-purpose flour or using honey instead of maple syrup in the filling. To maintain freshness, store the cream cheese filling separately from the muffins until you’re ready to enjoy!
Conclusion
These Pumpkin Muffins with Maple Cream Cheese Filling have become a regular rotation recipe for me, as I make them almost every week because they’re not only deliciously moist but also pack 210 calories per muffin. The addition of pumpkin puree truly elevates these muffins, giving them an irresistible flavor and texture that sets them apart from typical baked goods. Give this one a try this week. I promise it’ll become a regular rotation meal in your house too.
Pumpkin Muffins with Maple Cream Cheese Filling
Ingredients
Method
- In a mixing bowl, beat the softened cream cheese until smooth.
- Add maple syrup and vanilla extract, and mix until well combined.
- Preheat the oven to 350°F (175°C) and grease a muffin tin.
- In a large bowl, whisk together the flour, baking powder, baking soda, cinnamon, nutmeg, and salt.
- In another bowl, mix the pumpkin puree, brown sugar, granulated sugar, vegetable oil, and eggs until smooth.
- Gradually add the dry ingredients to the wet ingredients, stirring until just combined.
- Fill each muffin cup halfway with the batter.
- Add a spoonful of the maple cream cheese filling on top of the batter in each cup.
- Top with remaining batter until cups are about 3/4 full.
- Bake in the preheated oven for 20-25 minutes or until a toothpick inserted comes out clean.
- Let cool in the pan for 5 minutes before transferring to a wire rack.