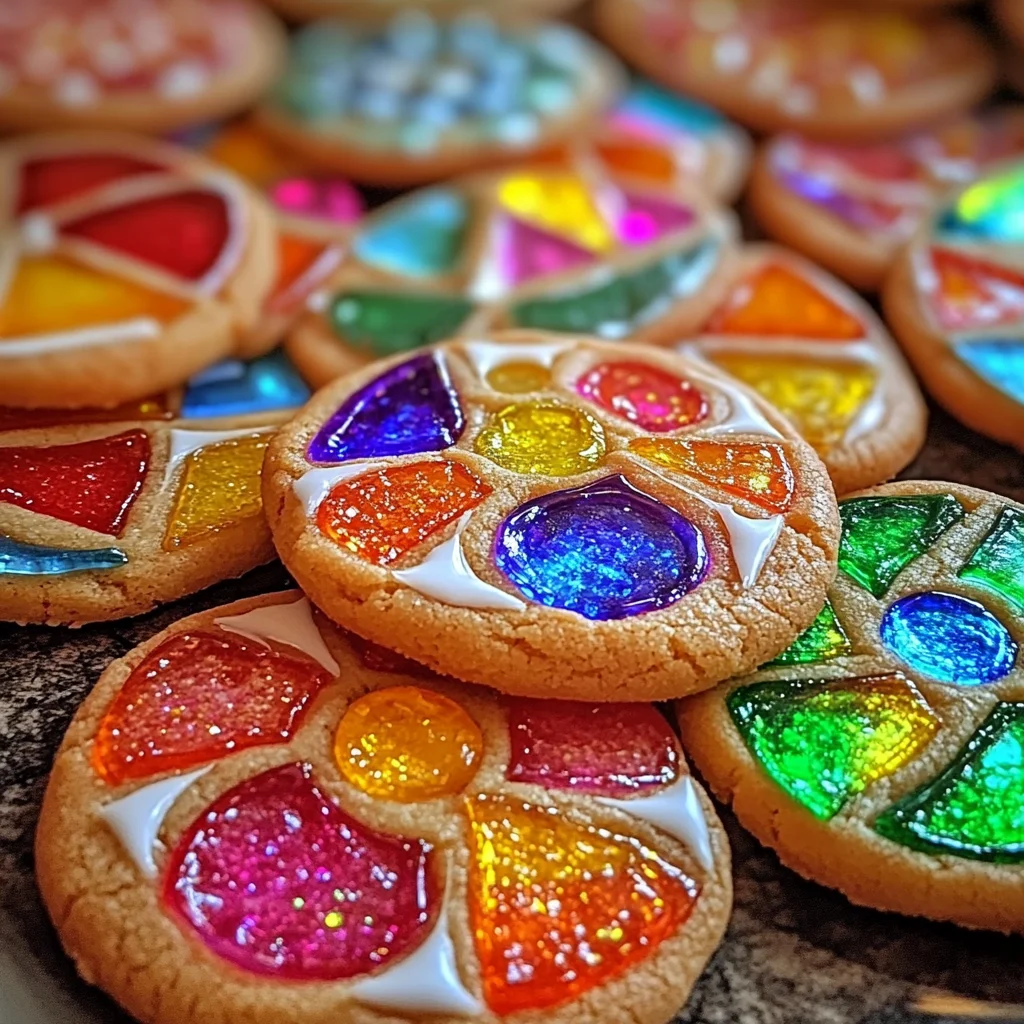
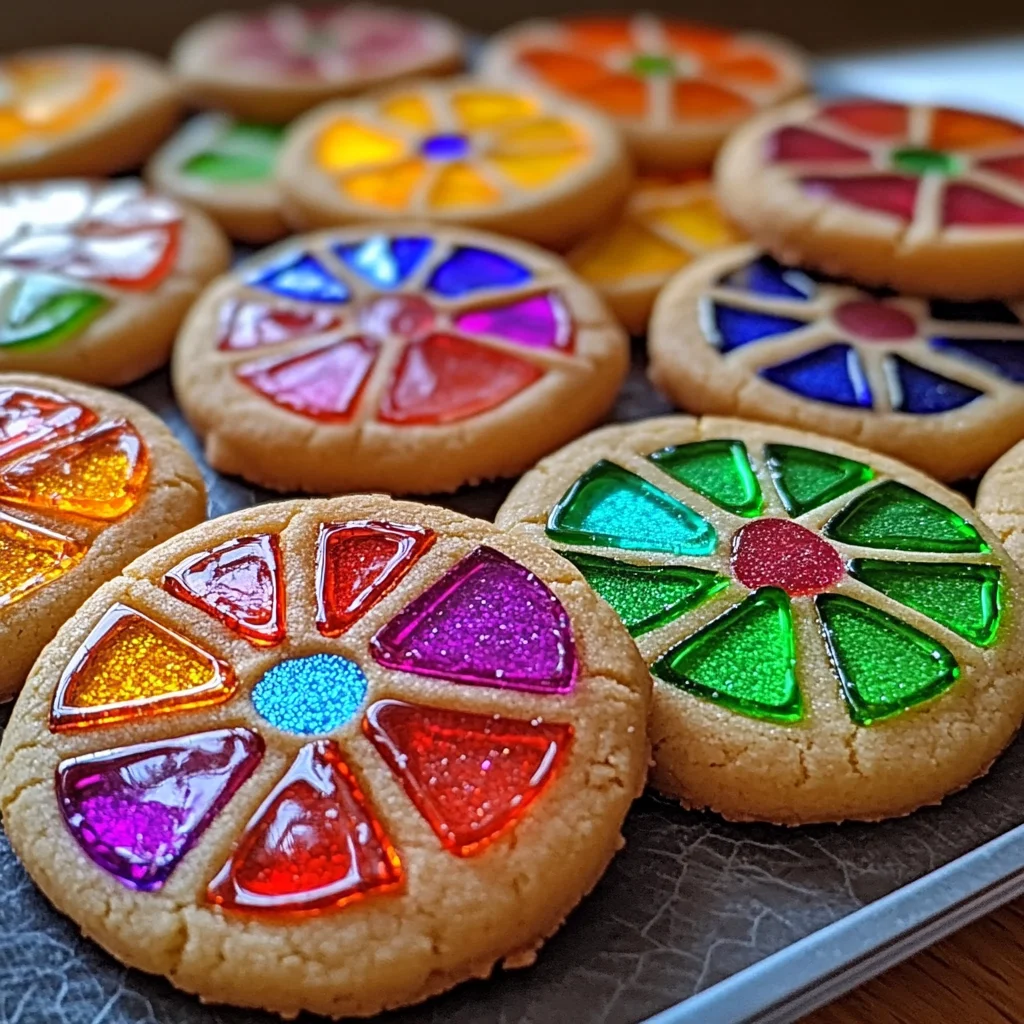
Stained Glass Cookies: Festive Treats That Dazzle and Delight
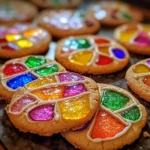
If you’re looking for a fun and colorful treat that brings joy to any gathering, look no further than Stained Glass Cookies: Festive Treats That Dazzle and Delight. These cookies are not just delicious; they are a feast for the eyes too! I love making these with my family during the holidays, but they’re perfect for any occasion. The vibrant colors of the crushed candies create beautiful, jewel-like designs that will impress friends and family alike.
What makes this recipe even more special is how easy it is to prepare. Whether you’re baking on a busy weeknight or planning a delightful weekend activity with your kids, these cookies fit right in. They’re sure to become a cherished tradition in your home as they have in mine!
Why You’ll Love This Recipe
- Simple to Make: With straightforward steps, even beginner bakers can whip these up with ease.
- Family-Friendly Fun: Get the kids involved! They’ll love crushing the candies and decorating their cookies.
- Gorgeous Presentation: The colorful stained glass effect is not only fun to make but also beautiful on display.
- Versatile Recipe: You can easily adapt these cookies for various occasions, from holiday parties to birthday celebrations.
- Deliciously Buttery Flavor: The combination of buttery goodness and sweet candy creates an irresistible treat.
Ingredients You’ll Need
To make these delightful cookies, you’ll need simple, wholesome ingredients that come together beautifully. Here’s what you’ll be gathering:
For the Cookie Dough
- 3 cups All-Purpose Flour (Can substitute with gluten-free flour.)
- 1 cup Butter (Soft, room temperature; use plant-based butter for dairy-free.)
- 1 cup Granulated Sugar (Brown sugar can enhance flavor.)
- 2 large Eggs (Use aquafaba as vegan substitute.)
- 1 teaspoon Baking Soda (No substitutions needed.)
For the Stained Glass Effect
- 1 cup Crushed Hard Candies (Colorful mix, such as Jolly Ranchers.)
Variations
This cookie recipe is wonderfully flexible! Here are some fun variations you might like to try:
- Change Up the Candies: Swap out the hard candies for different flavors or colors to create unique designs.
- Add Spices: Include cinnamon or nutmeg into the dough for a warm spice twist.
- Make Them Vegan: Use plant-based butter and aquafaba instead of eggs for a delightful vegan version.
- Decorate with Sprinkles: Before baking, sprinkle some festive sprinkles on top for added flair!
How to Make Stained Glass Cookies: Festive Treats That Dazzle and Delight
Step 1: Prepare Your Oven and Baking Sheets
Start by preheating your oven to 350°F (175°C). Line your baking sheets with parchment paper. This will prevent sticking and make cleanup a breeze!
Step 2: Mix Your Dough
In a large mixing bowl, combine the softened butter and granulated sugar. Beat them together until light and fluffy—this step is key as it incorporates air into your dough, making your cookies tender. Next, add in the eggs (or aquafaba) and mix until fully combined.
Step 3: Combine Dry Ingredients
In another bowl, whisk together the all-purpose flour and baking soda. Gradually add this mixture into your wet ingredients. Stir until just combined—overmixing can lead to tough cookies!
Step 4: Shape the Cookies
Scoop out tablespoon-sized amounts of dough and form them into balls. Place them on your prepared baking sheet about two inches apart. Press down gently in the center of each ball.
Step 5: Add the Candy Centerpieces
Now comes the fun part! Take your crushed hard candies and fill each indentation in the cookie dough balls with them. The more colorful, the better!
Step 6: Bake Your Cookies
Pop those trays into your preheated oven and bake for about 10-12 minutes or until lightly golden at the edges. Keep an eye on them; you want that stunning stained glass effect without burning!
Step 7: Cool Down and Enjoy!
Once baked, let them cool on the baking sheet for a few minutes before transferring them to a wire rack to cool completely. And there you have it—your Stained Glass Cookies: Festive Treats That Dazzle and Delight are ready to be enjoyed!
Pro Tips for Making Stained Glass Cookies: Festive Treats That Dazzle and Delight
Baking these colorful cookies can be a joyful experience, especially with a few handy tips to ensure they turn out perfect every time!
-
Chill the Dough: Refrigerating the cookie dough for at least an hour helps prevent spreading during baking, resulting in beautifully shaped cookies.
-
Use Quality Candies: Opt for vibrant hard candies like Jolly Ranchers that melt well. The colors will shine through and create that stunning stained glass effect!
-
Keep It Even: Roll your dough to an even thickness of about 1/4 inch. This ensures that all cookies bake uniformly, making them look professional and appealing.
-
Watch the Baking Time: Keep a close eye on your cookies as they bake. They should be lightly golden around the edges while remaining soft in the middle—perfectly chewy!
-
Cool Completely Before Handling: Allow your cookies to cool completely on the baking sheet before transferring them. This prevents breakage and keeps their beautiful shapes intact.
How to Serve Stained Glass Cookies: Festive Treats That Dazzle and Delight
These stained glass cookies are not only delicious but also visually captivating, making them a fantastic addition to any festive gathering. Here are some fun ways to present them!
Garnishes
-
Powdered Sugar Dusting: A light sprinkle of powdered sugar adds a touch of elegance and enhances the visual appeal.
-
Edible Glitter: For an extra sparkle, consider using edible glitter or shimmer dust. It gives your cookies a magical effect perfect for celebrations.
Side Dishes
-
Fruit Platter: A colorful assortment of fresh fruits provides a refreshing contrast to the sweetness of the cookies. Think strawberries, kiwi slices, and blueberries!
-
Hot Cocoa or Herbal Tea: Pair your cookies with a warm drink like rich hot cocoa or herbal tea for a cozy experience. The flavors will complement each other beautifully.
-
Cheese Board: A selection of mild cheeses with crackers can balance out the sweetness of the cookies, creating an inviting snack spread.
-
Ice Cream: Serve these delightful cookies alongside scoops of dairy-free ice cream for a fun twist! Try flavors like vanilla or berry to enhance their sweetness without overpowering it.
Now you’re ready to dazzle your guests with these festive stained glass cookies! Happy baking!
Make Ahead and Storage
These Stained Glass Cookies are not only a joy to make but also perfect for meal prep! You can whip up a batch in advance, ensuring that you have festive treats ready whenever the occasion calls for them.
Storing Leftovers
- Store the cookies in an airtight container at room temperature.
- They will stay fresh for up to one week.
- If you live in a humid environment, consider placing parchment paper between layers to prevent sticking.
Freezing
- Allow the cookies to cool completely before freezing.
- Place them in a single layer in a freezer-safe container or bag.
- They can be frozen for up to three months. Just remember to label with the date!
Reheating
- To enjoy your cookies warm, preheat your oven to 350°F (175°C).
- Place the cookies on a baking sheet and heat for about 5-7 minutes.
- This will help restore their delightful texture and flavor.
FAQs
Here are some common questions that might arise while making these colorful treats!
Can I use gluten-free flour for stained glass cookies?
Absolutely! You can substitute all-purpose flour with gluten-free flour, and your stained glass cookies will still turn out deliciously vibrant.
How do I make Stained Glass Cookies: Festive Treats That Dazzle and Delight vegan?
To make these cookies vegan, simply replace the eggs with aquafaba, which works wonderfully as an egg substitute in this recipe.
What kind of hard candies work best?
A colorful mix of hard candies like Jolly Ranchers or any other variety will provide that stunning stained glass effect. Just crush them well before adding!
How long do stained glass cookies last?
When stored properly in an airtight container, these delightful treats can last up to one week at room temperature.
Can I decorate stained glass cookies?
Of course! Once cooled, feel free to add icing or edible glitter for an extra festive touch.
Final Thoughts
I hope you find as much joy in making these Stained Glass Cookies as I do! Each cookie is a little piece of art that brings warmth and cheer to any gathering. Remember, there’s nothing quite like sharing homemade treats with loved ones. Enjoy every moment of creating these dazzling delights and have fun experimenting with colors and flavors. Happy baking!
Stained Glass Cookies: Festive Treats That Dazzle and Delight
Indulge in the joy of baking with these Stained Glass Cookies: Festive Treats That Dazzle and Delight. These colorful cookies are not only visually striking but also incredibly easy to make, making them a perfect addition to any gathering. With vibrant crushed candies creating a stunning stained glass effect, each cookie is sure to impress your friends and family. Whether you’re baking with kids or entertaining guests, these delightful treats will become a cherished tradition in your home.
- Prep Time: 15 minutes
- Cook Time: 12 minutes
- Total Time: 27 minutes
- Yield: Approximately 24 cookies 1x
- Category: Dessert
- Method: Baking
- Cuisine: American
Ingredients
- 3 cups All-Purpose Flour (or gluten-free flour)
- 1 cup Butter (or plant-based butter)
- 1 cup Granulated Sugar (brown sugar optional)
- 2 large Eggs (or aquafaba for vegan version)
- 1 teaspoon Baking Soda
- 1 cup Crushed Hard Candies (like Jolly Ranchers)
Instructions
- Preheat the oven to 350°F (175°C) and line baking sheets with parchment paper.
- In a bowl, cream together softened butter and sugar until light and fluffy. Add eggs (or aquafaba) and mix well.
- In another bowl, whisk flour and baking soda, then gradually incorporate into the wet mixture until just combined.
- Form tablespoon-sized dough balls and place them on the baking sheet. Press down slightly in the center.
- Fill each indentation with crushed candies.
- Bake for 10-12 minutes until lightly golden around the edges.
- Cool on the baking sheet before transferring to a wire rack.
Nutrition
- Serving Size: 1 cookie (30g)
- Calories: 150
- Sugar: 10g
- Sodium: 70mg
- Fat: 7g
- Saturated Fat: 4g
- Unsaturated Fat: 2g
- Trans Fat: 0g
- Carbohydrates: 20g
- Fiber: <1g
- Protein: 2g
- Cholesterol: 20mg